Documentation Centre
Welcome to the S-RCS documentation. S-RCS is a comprehensive web-based portal designed to revolutionize Windows Active Directory management, moving administration from traditional tools to a streamlined web platform.
Note: This documentation is actively being enriched. Sections are being added and expanded regularly to provide a more comprehensive guide.
System Architecture
[ PHP/Apache ] [ MySQL ] [ phpMyAdmin ]
[ Active Directory DS ] [ Certificate Services ]
System Requirements
S-RCS Server
- OS: Windows 10/11, Ubuntu 20.04+, macOS
- RAM: Minimum 2GB (4GB Recommended)
- Disk: 10GB Free Space
- Soft: Docker Desktop / Engine
Active Directory
- OS: Windows Server 2016/2019/2022
- Roles: AD DS, AD Certificate Services
- Network: Port 636 (LDAPS) Open
Download Project
First, get the project files onto your machine.
1. Download the Project
Option A: Using Git (Recommended)
git clone https://github.com/Ali7Zeynalli/S-RCS.git
cd S-RCS
Option B: Download ZIP
- Go to GitHub Page.
- Click green Code button.
- Select Download ZIP.
- Extract to a folder.
2. Configuration (.env)
Open the .env file and update the database credentials. You must change the default passwords!
MYSQL_ROOT_PASSWORD and MYSQL_PASSWORD.
MYSQL_ROOT_PASSWORD=StrongPassword123!
MYSQL_DATABASE=ldap_auth
MYSQL_USER=srcs_admin
MYSQL_PASSWORD=YourPasswordHere!

# Ports
HTTP_PORT=8080
HTTPS_PORT=8043
3. Start Containers
# Build and start services
docker-compose up -d --build

# Check status (Wait 1-2 mins for MySQL)
docker-compose ps
Docker Installation
If you haven't installed Docker yet, follow the instructions for your operating system below.
Windows 10/11
- Download Docker Desktop.
- Install and restart your computer.
- Open Docker Desktop Settings.
- General → Enable "Use the WSL 2 based engine".
Ubuntu / Debian
sudo apt update
sudo apt install -y docker.io docker-compose
sudo usermod -aG docker $USER
# Log out and log back in
Windows Server 2019/2022
Install-Module -Name DockerMsftProvider -Force
Install-Package -Name docker -ProviderName DockerMsftProvider -Force
Restart-Computer
Active Directory Preparation
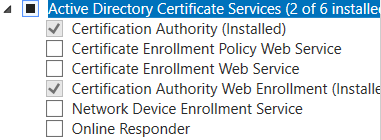
Step 1: Install Certificate Services
On your Domain Controller, install the Active Directory Certificate Services role via Server Manager. Include these sub-roles:
- ✅ Certification Authority
- ✅ Certification Authority Web Enrollment
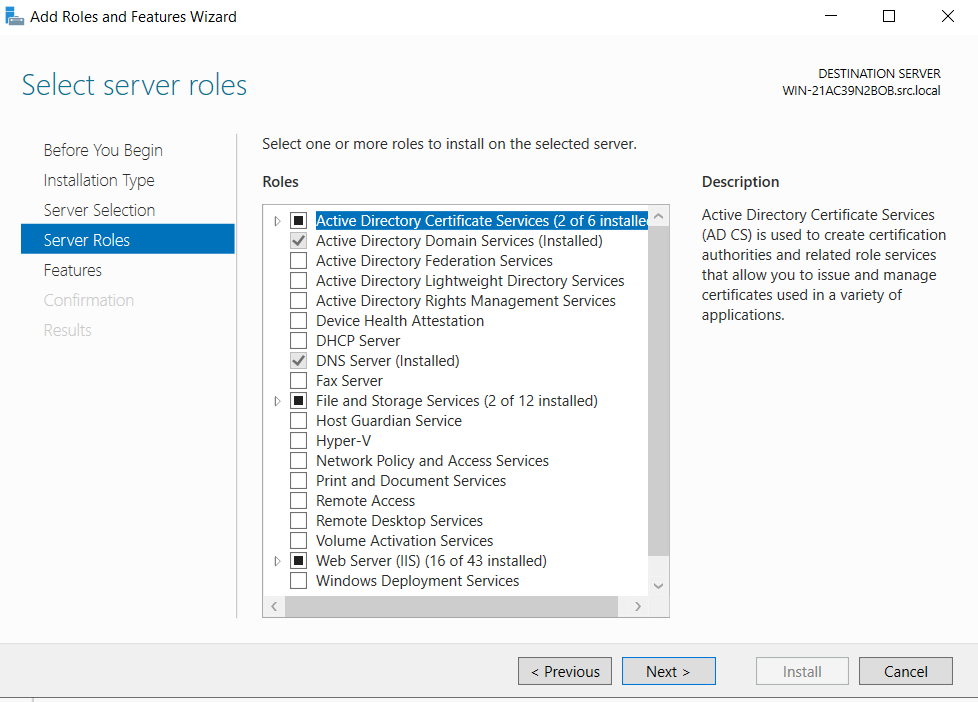
Step 2: CA Configuration
After installation, click the yellow notification flag in Server Manager to configure the service. Use these settings:
- Setup Type: Enterprise CA
- CA Type: Root CA
- Private Key: Create a new private key
- Cryptography: Default (SHA256)
- Validity: 5 Years
Step 3: Firewall Configuration
You must allow inbound traffic on Port 636. Use one of the following methods:
New-NetFirewallRule -Name "LDAPS" -DisplayName "LDAPS (636)" -Protocol TCP -LocalPort 636 -Action Allow -Direction Inbound- Open Windows Defender Firewall with Advanced Security (
wf.msc). - Select Inbound Rules → New Rule...
- Rule Type: Port.
- Protocol/Ports: TCP, Specific local ports:
636. - Action: Allow the connection.
- Name:
LDAPS (636).
Step 4: Verify LDAPS
Run this command on your DC to verify the port is listening:
Test-NetConnection -ComputerName localhost -Port 636
# Expected Result: TcpTestSucceeded : True
Setup Wizard
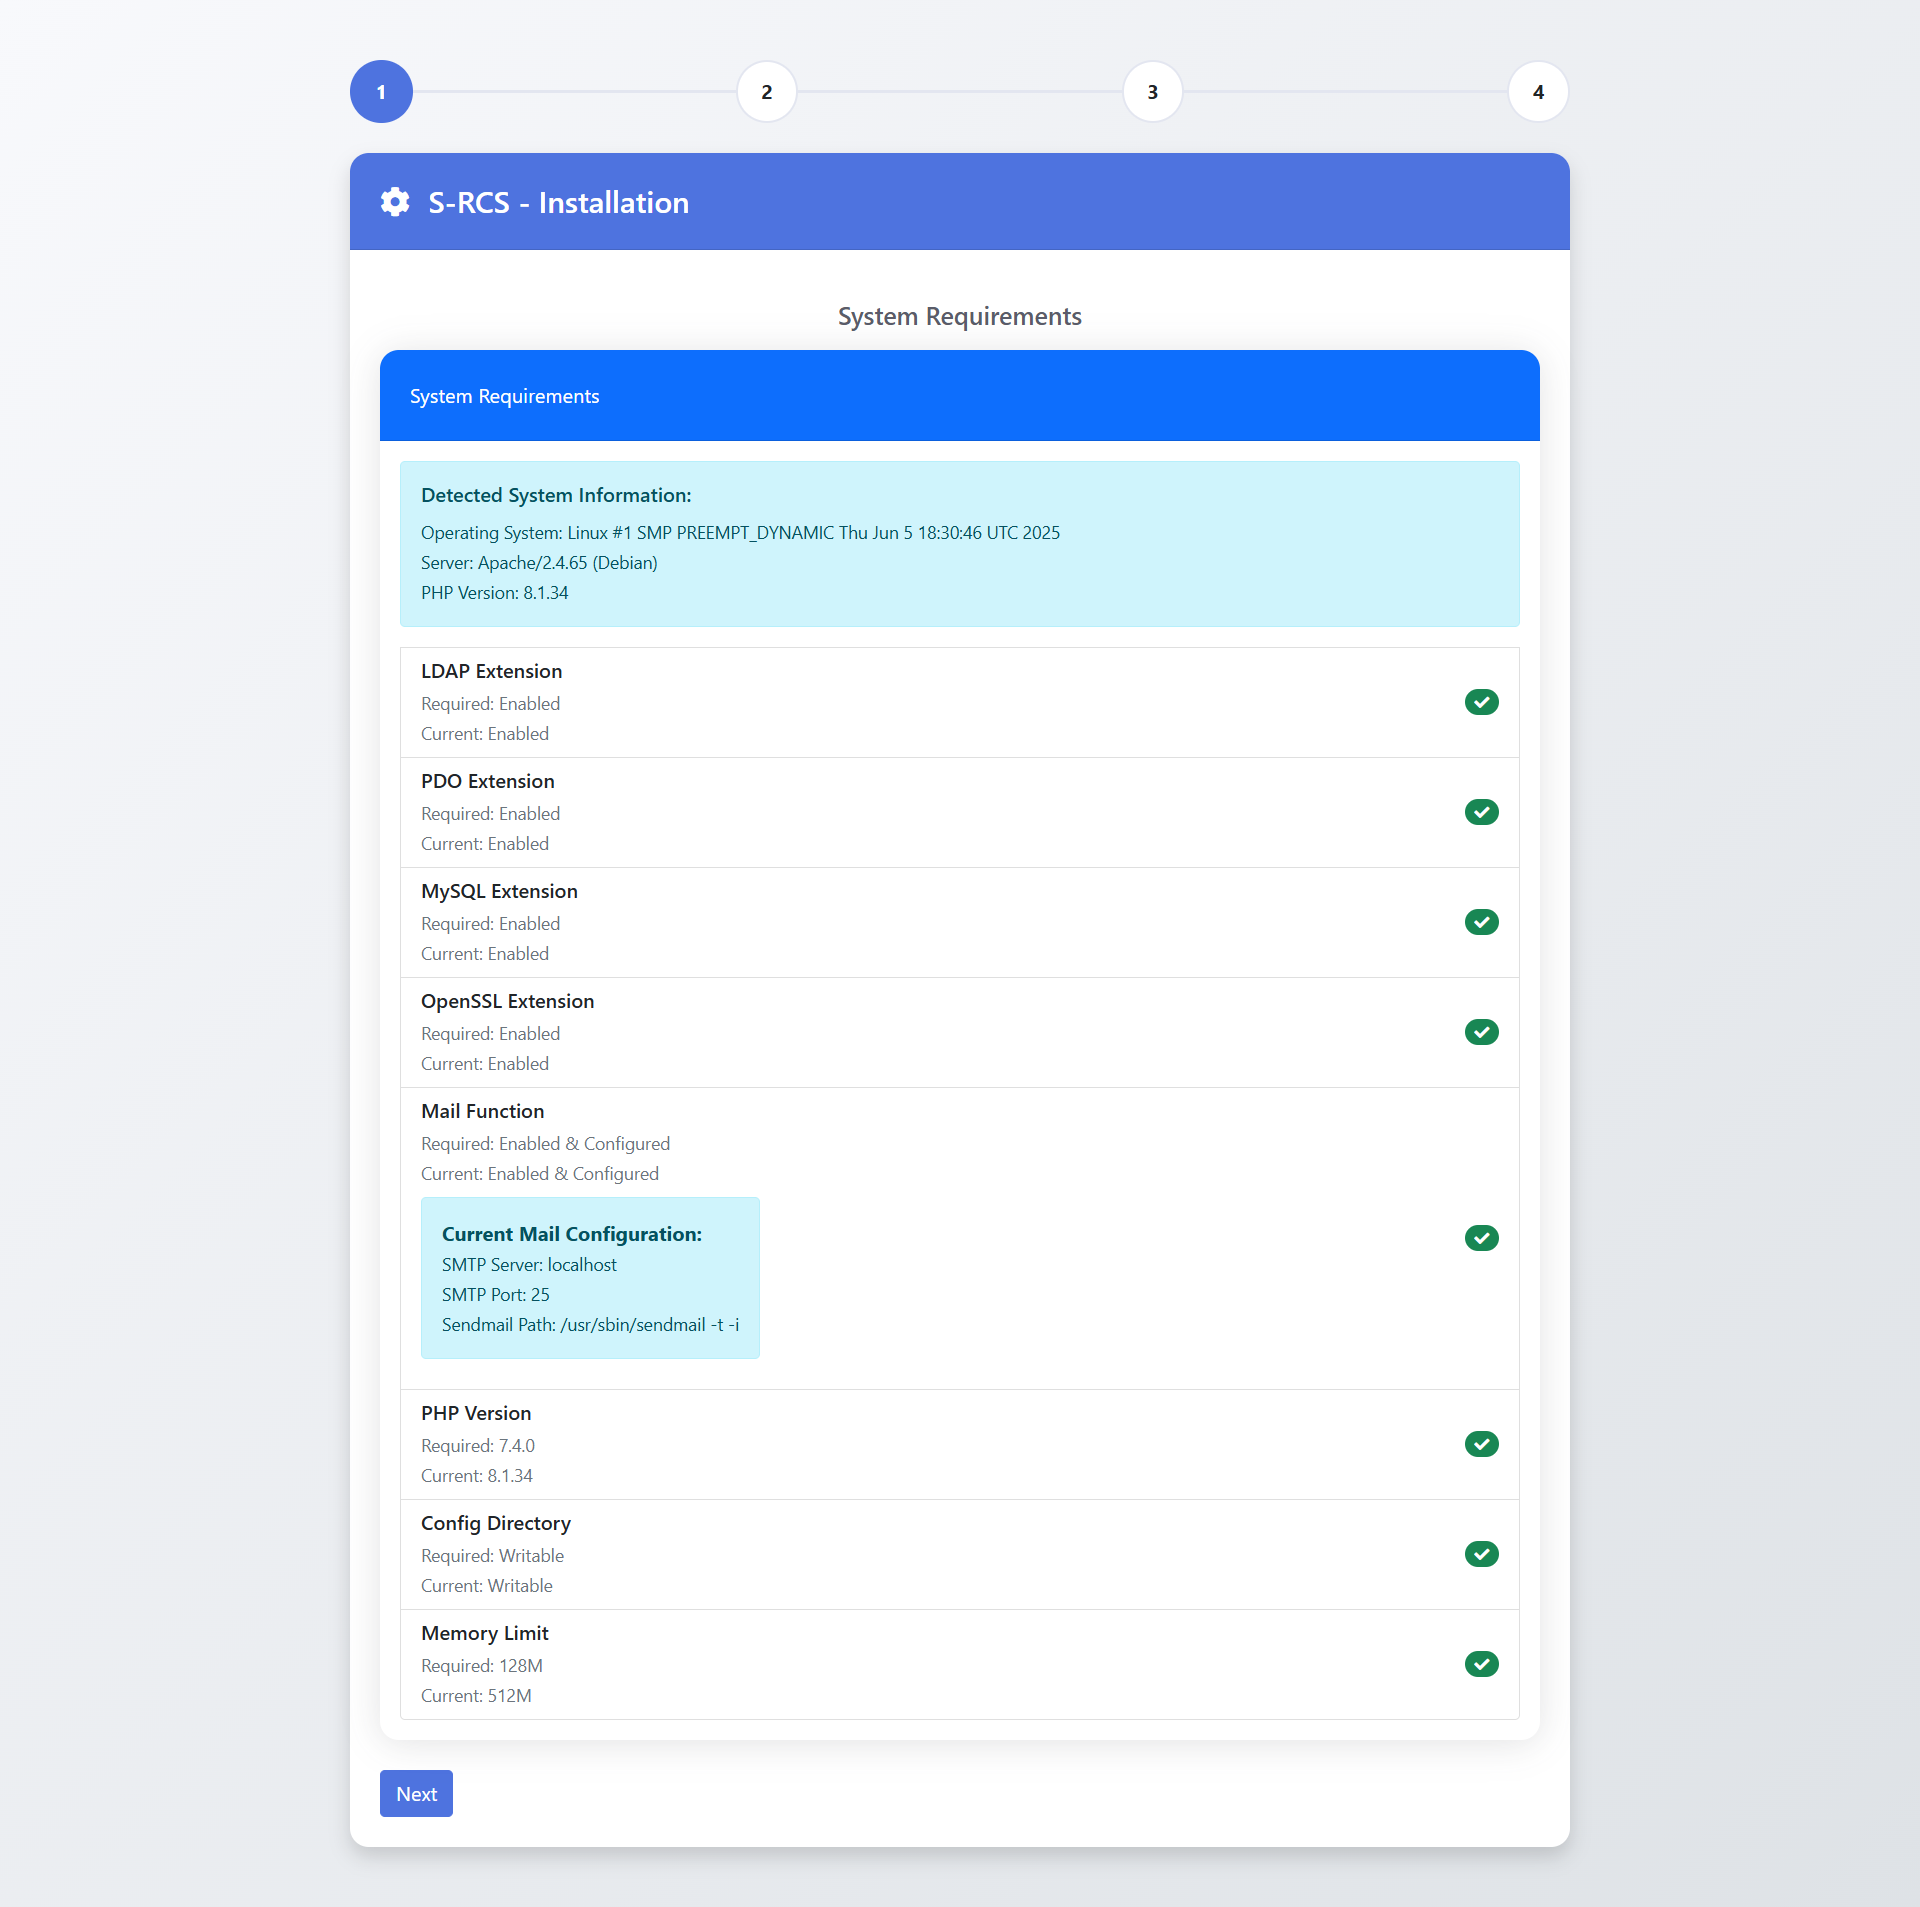
Once your containers are running, navigate to https://localhost:8043 (or your server IP). The installer will guide you through 6 steps:
Step 1: System Requirements
The system automatically checks for required extensions (LDAP, PDO, MySQL) and PHP version (7.4+).
- ✅ PHP 7.4+
- ✅ LDAP Extension
- ✅ OpenSSL
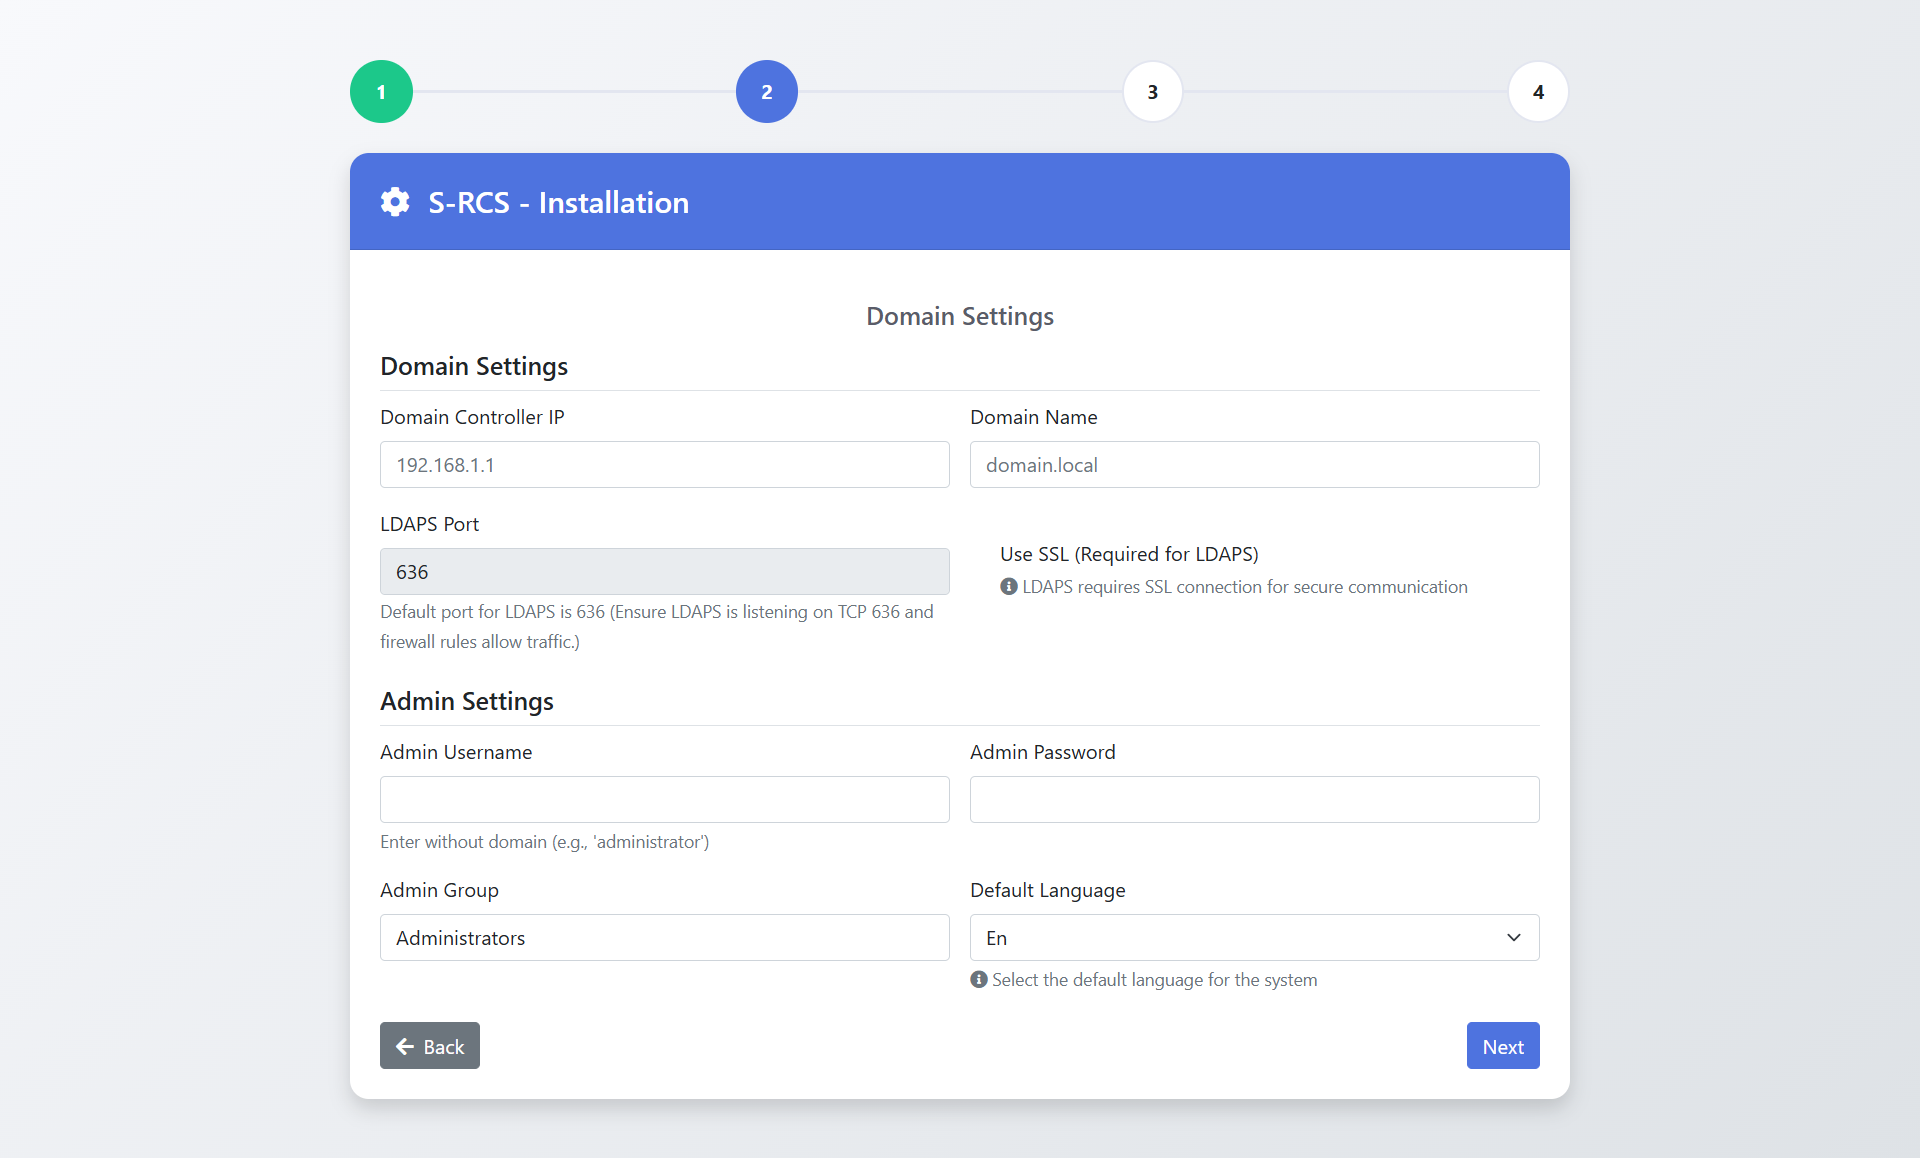
Step 2: Domain Configuration
Enter your Active Directory details.
| Domain Controller IP | e.g., 192.168.1.10 |
| LDAPS Port | 636 (Required) |
| Admin Group | Group allowed to login first (e.g. Domain Admins) |
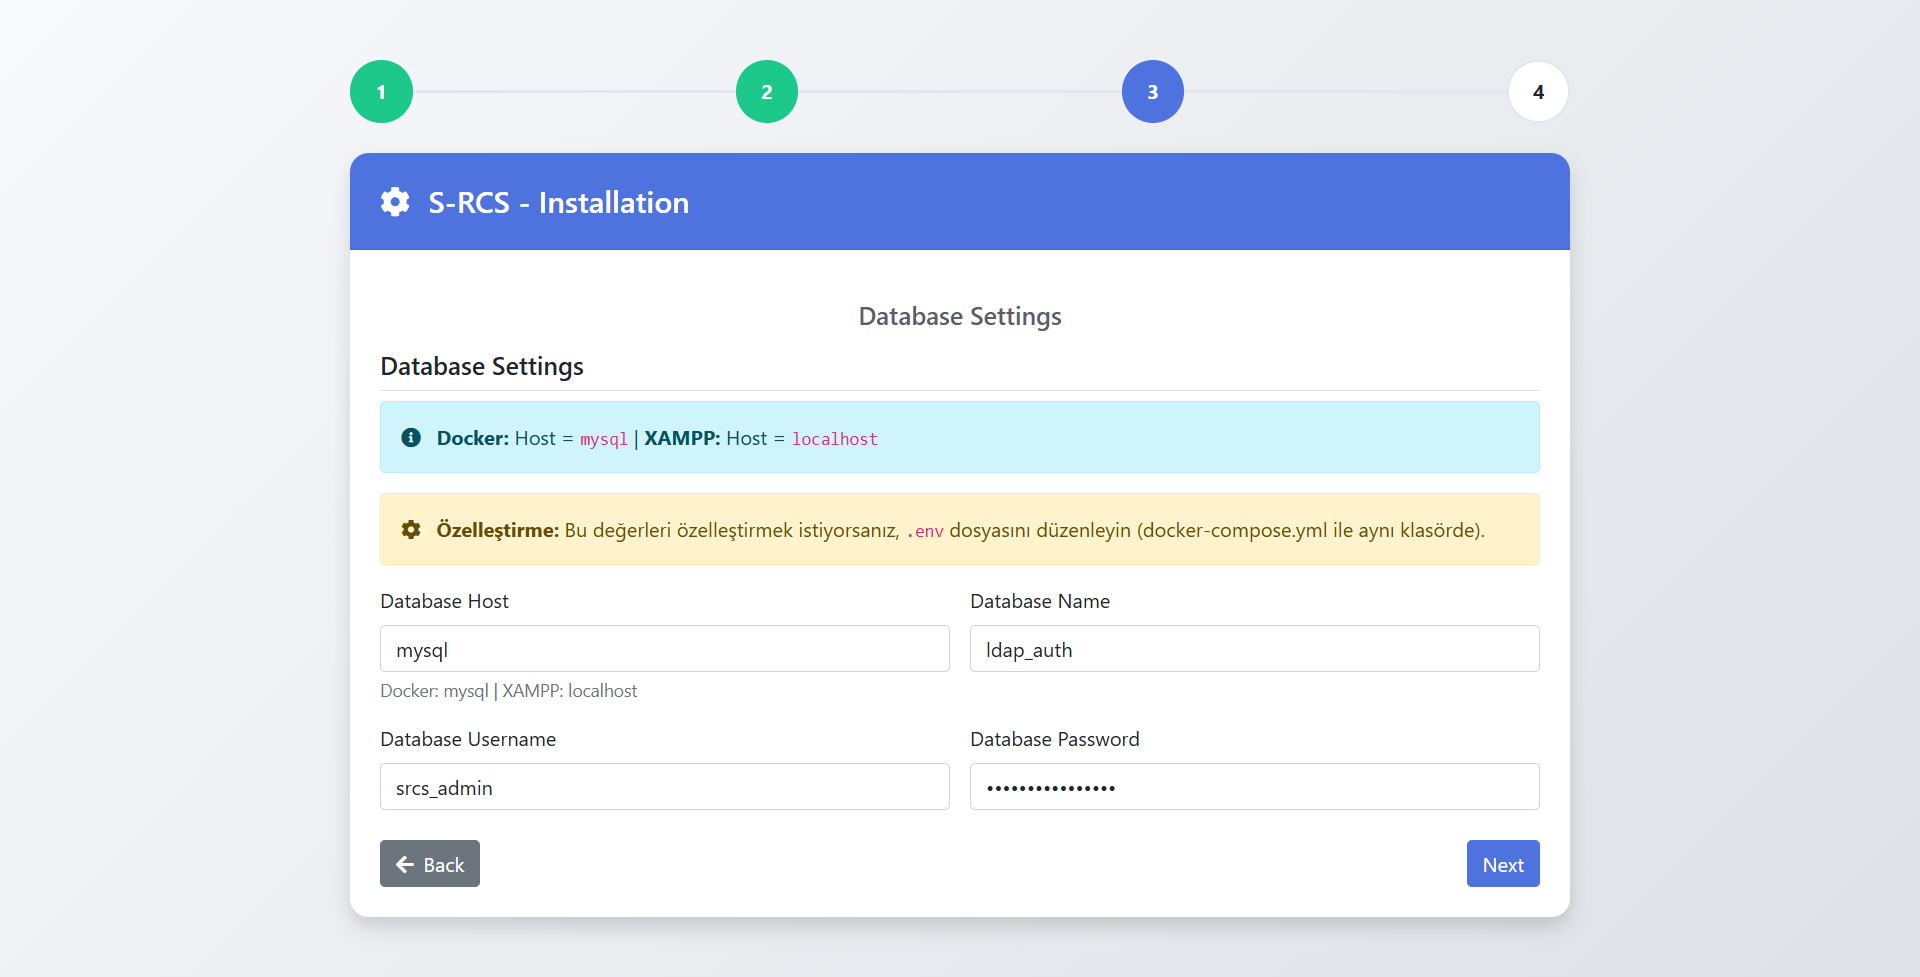
Step 3: Database
Read-only view of database settings loaded from `.env`.
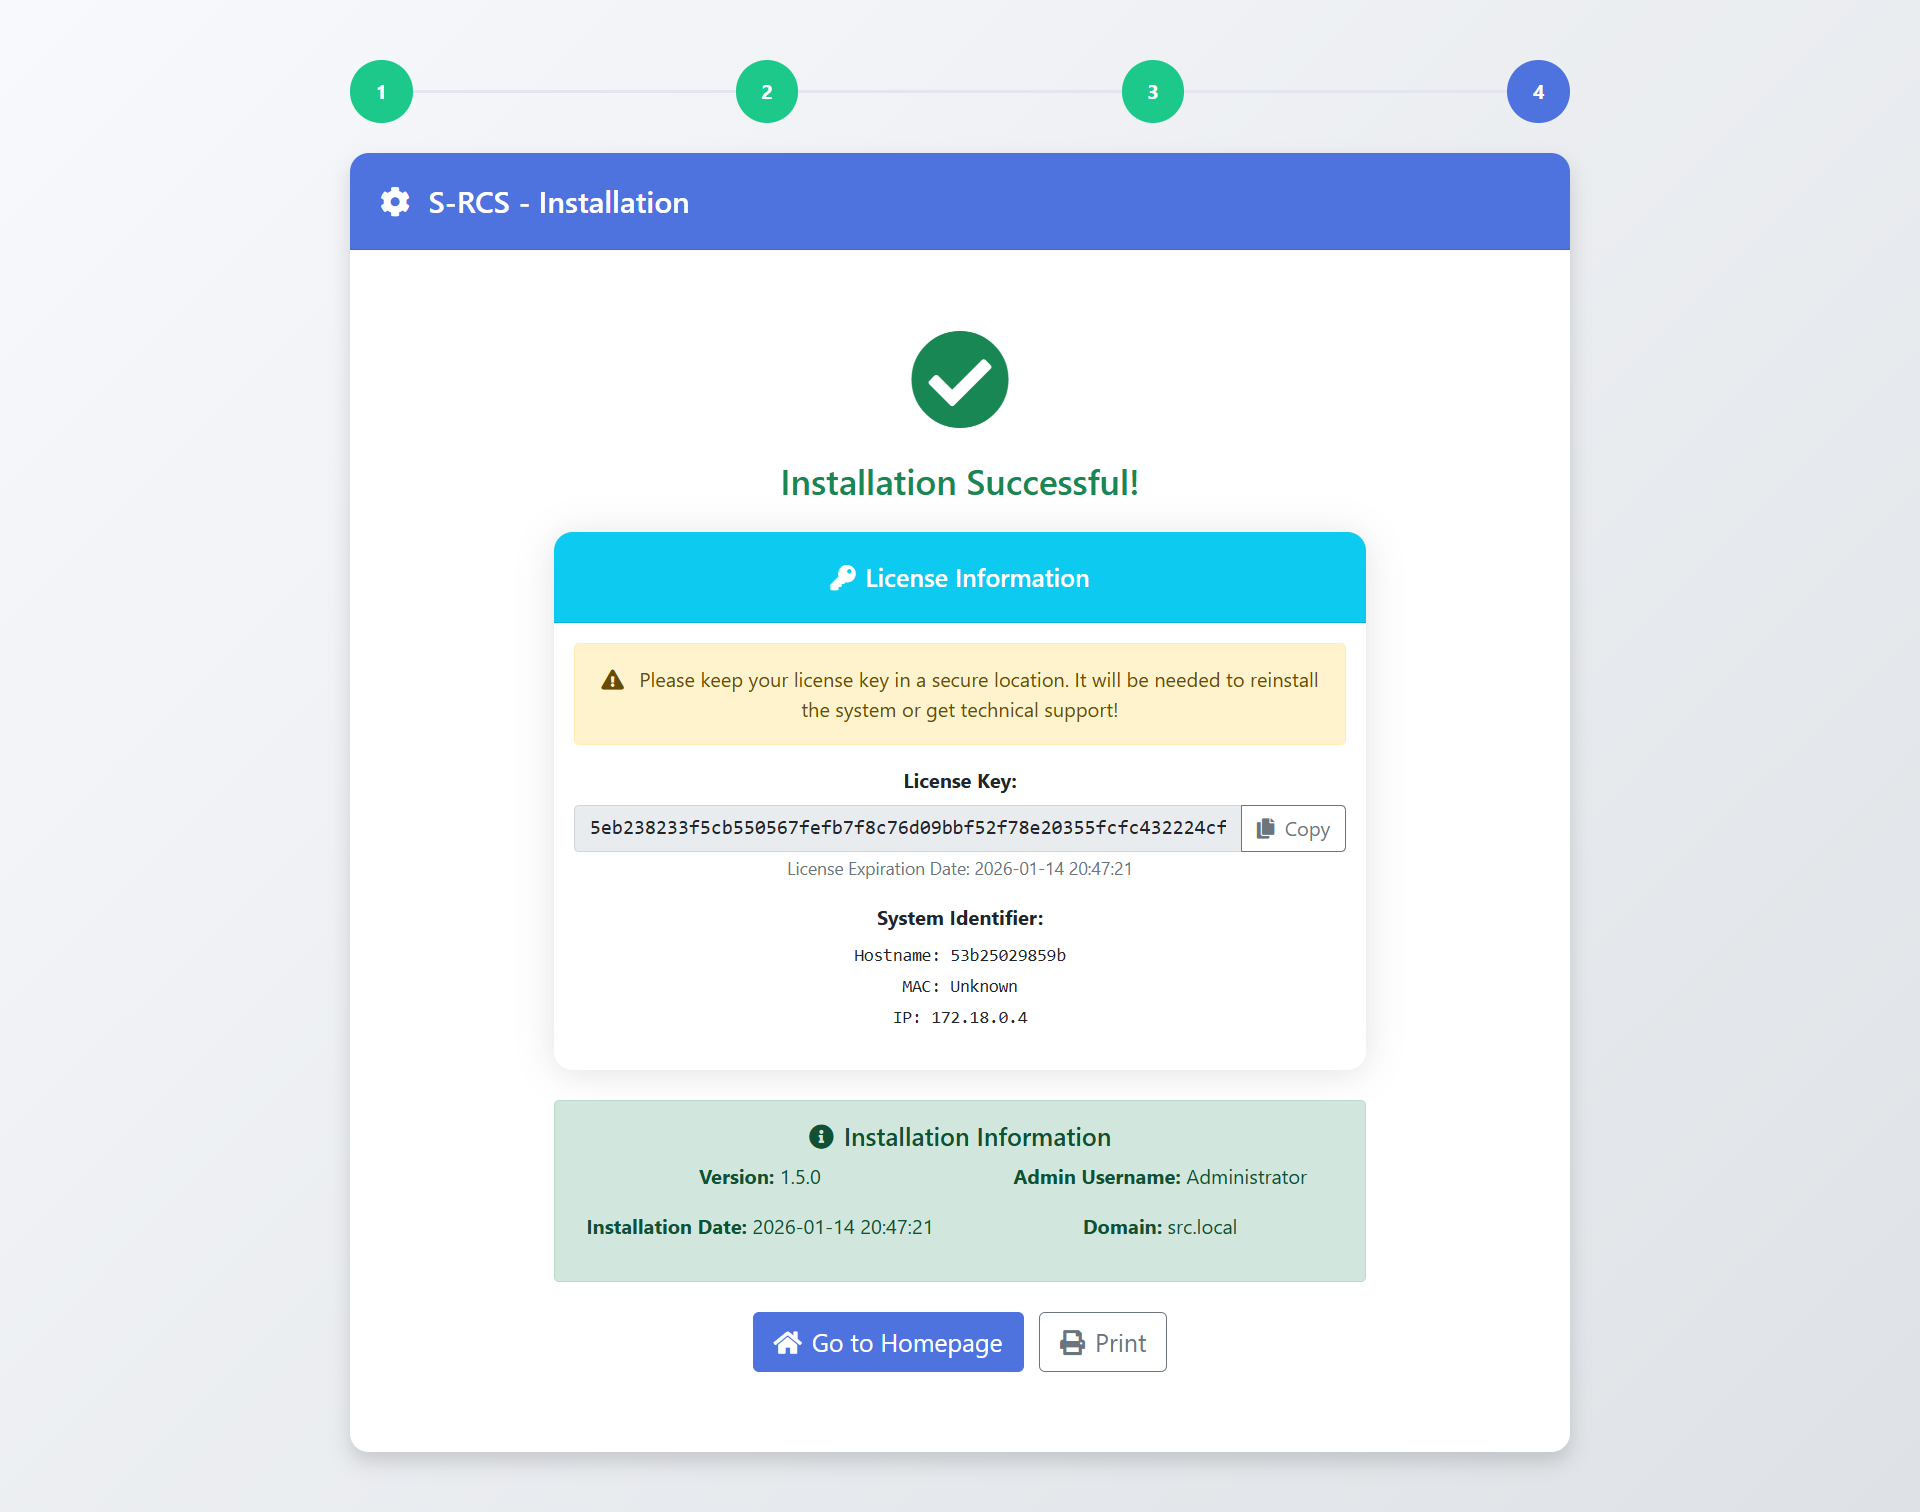
Step 4 & 5: Install
Review settings and click Install. You will receive a License Key.
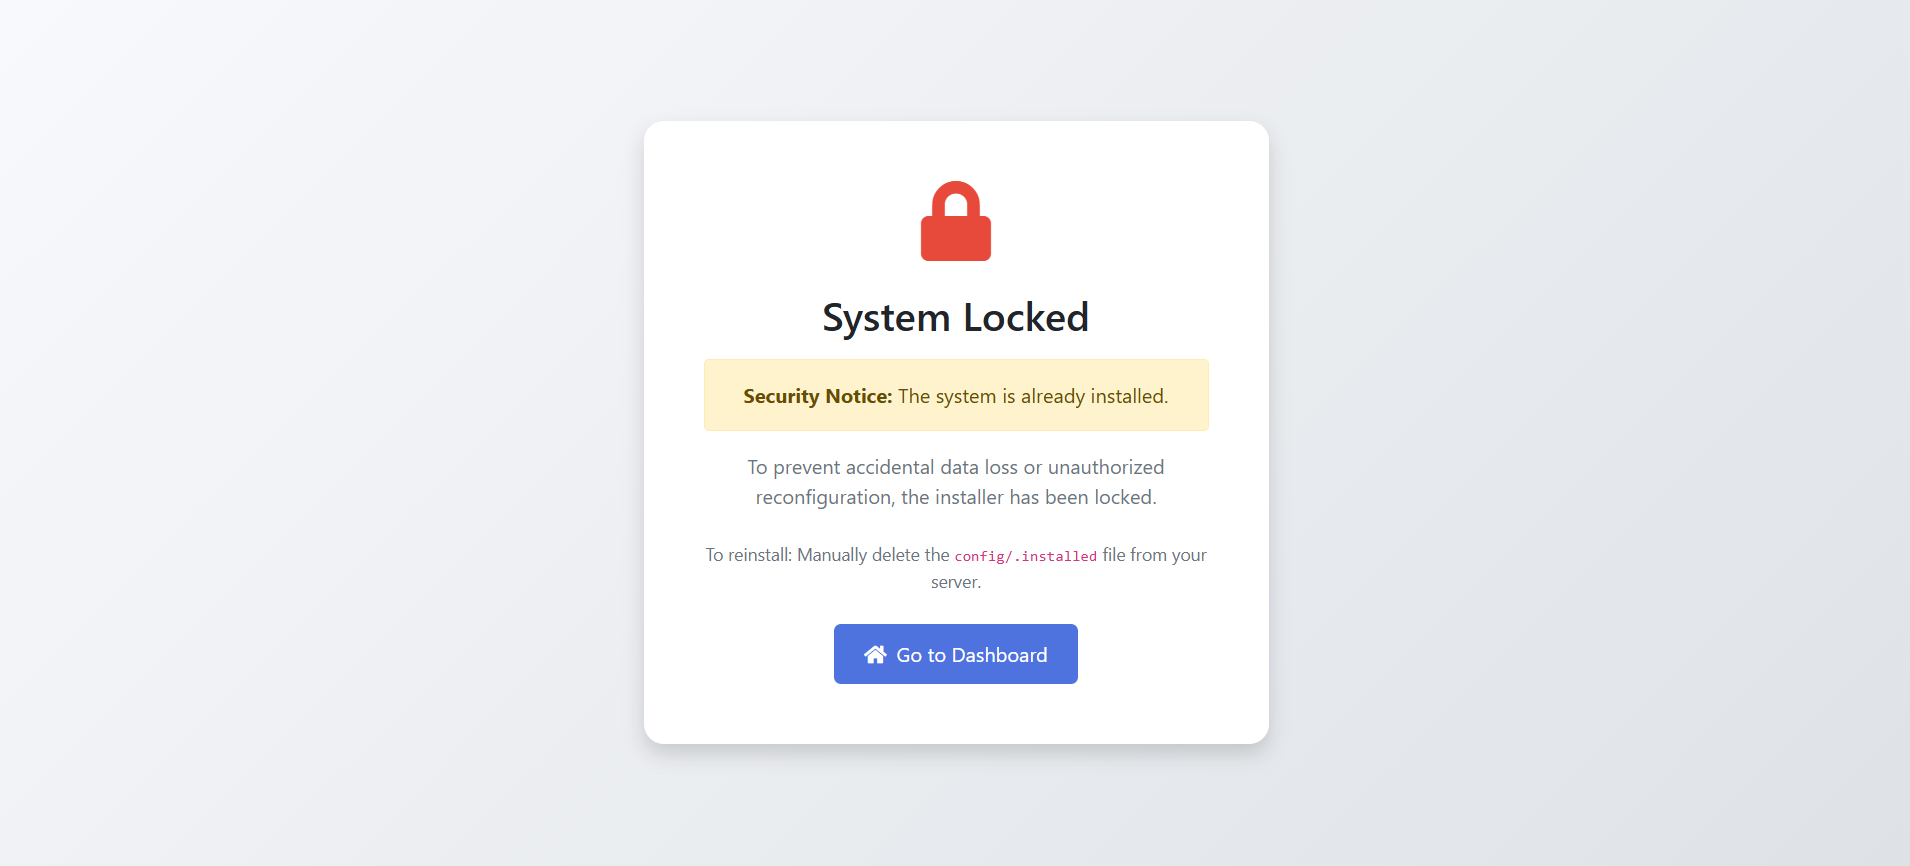
Step 6: Security Lock
After installation, the system locks automatically to prevent unauthorized access. If you try to access the installer again, you will see the "System Locked" screen.
- Navigate to
www/config/ - Delete the
.installedfile
Post-Installation
Granting Access
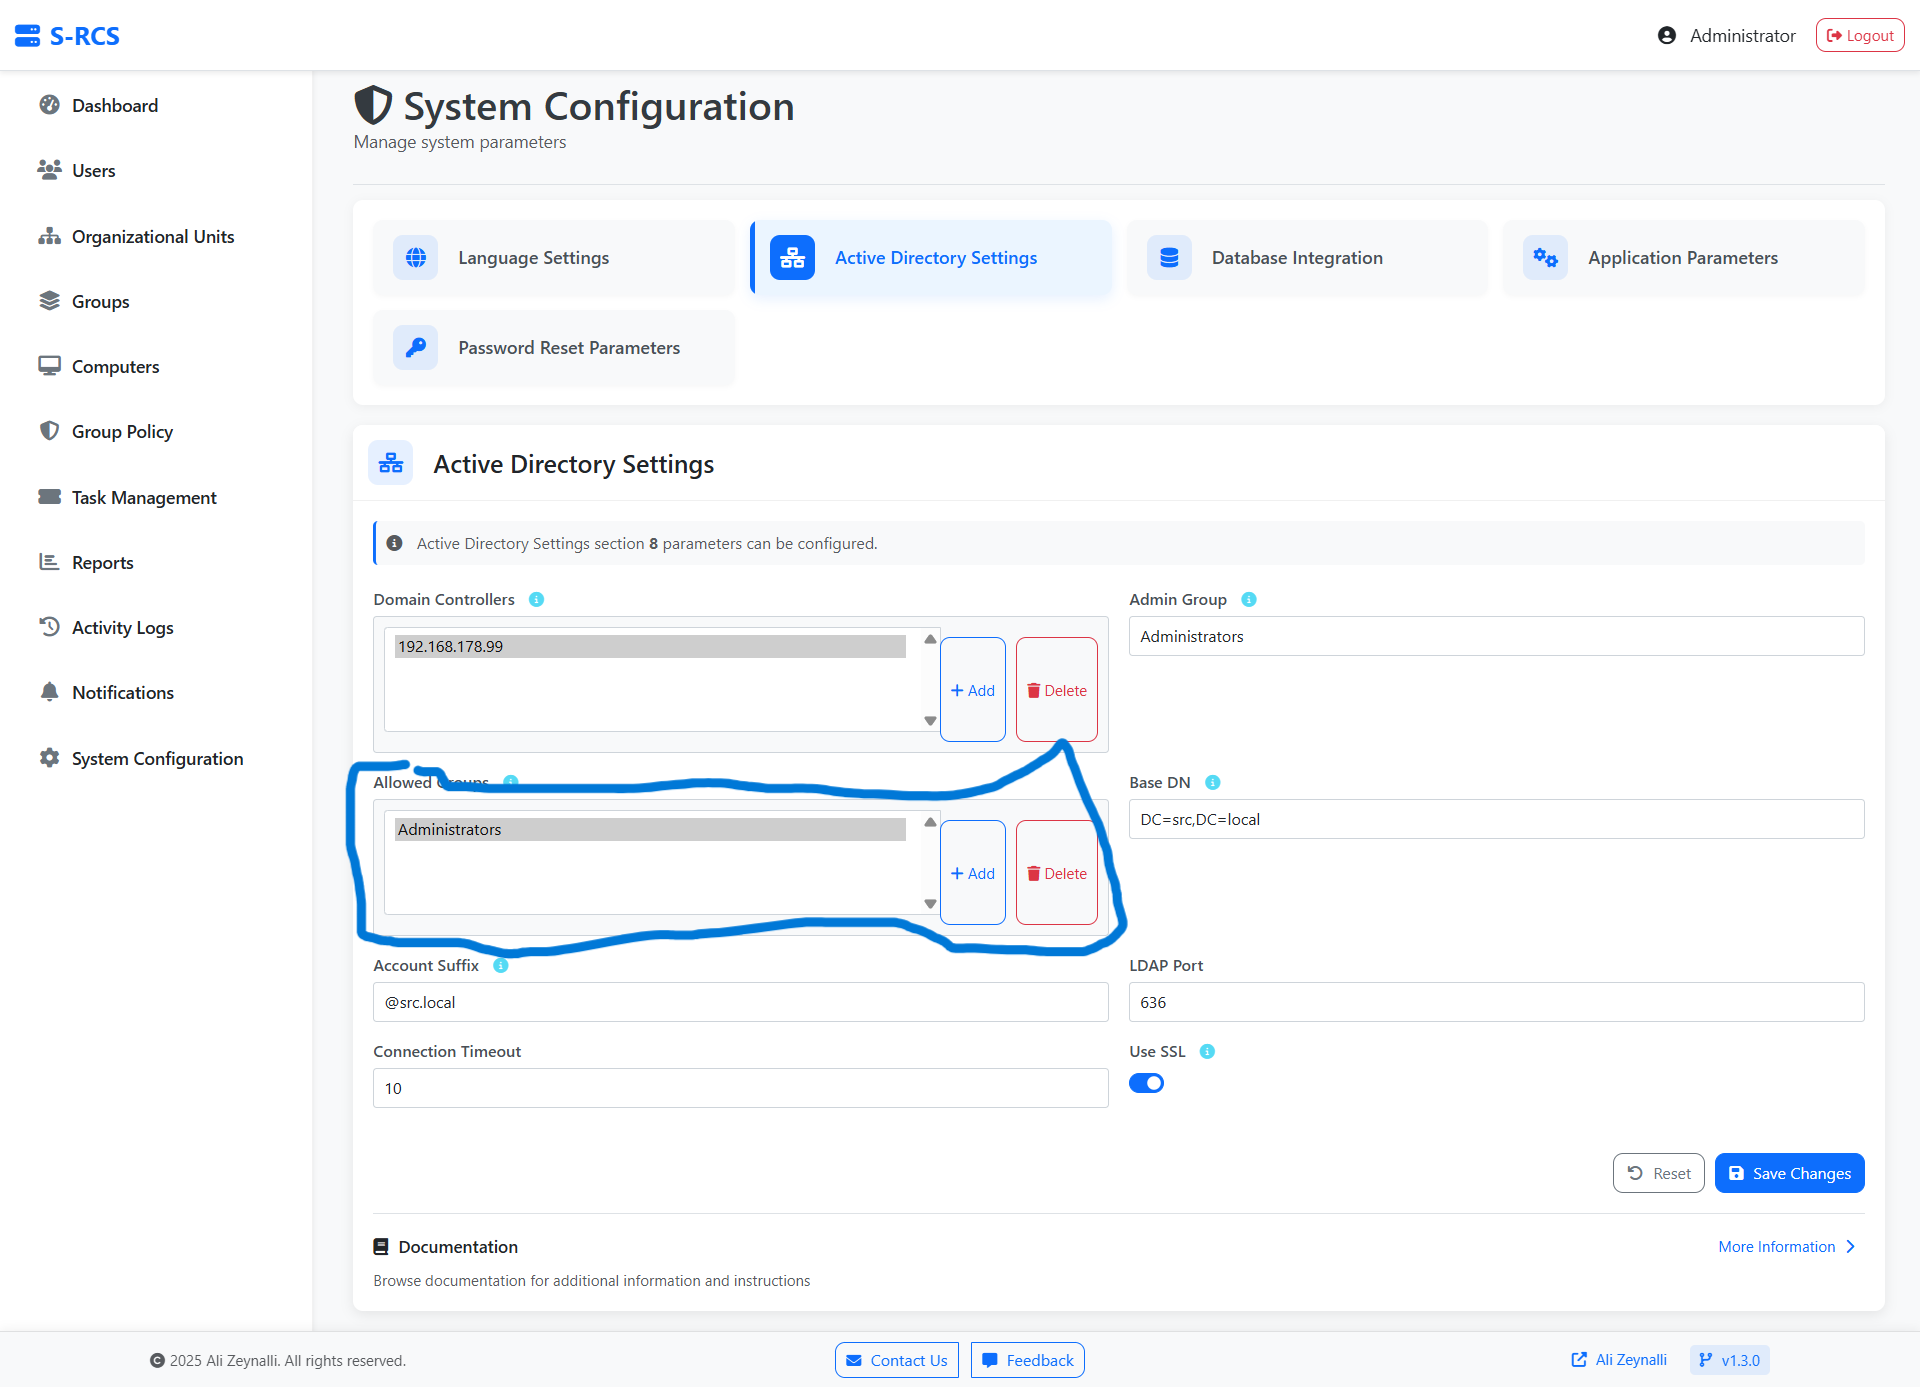
Initially, only the Admin Group (Step 2) can log in. To add more groups (e.g., "Helpdesk"):
- Log in as Admin.
- Go to System Settings → Active Directory.
- Add groups to Allowed Groups.
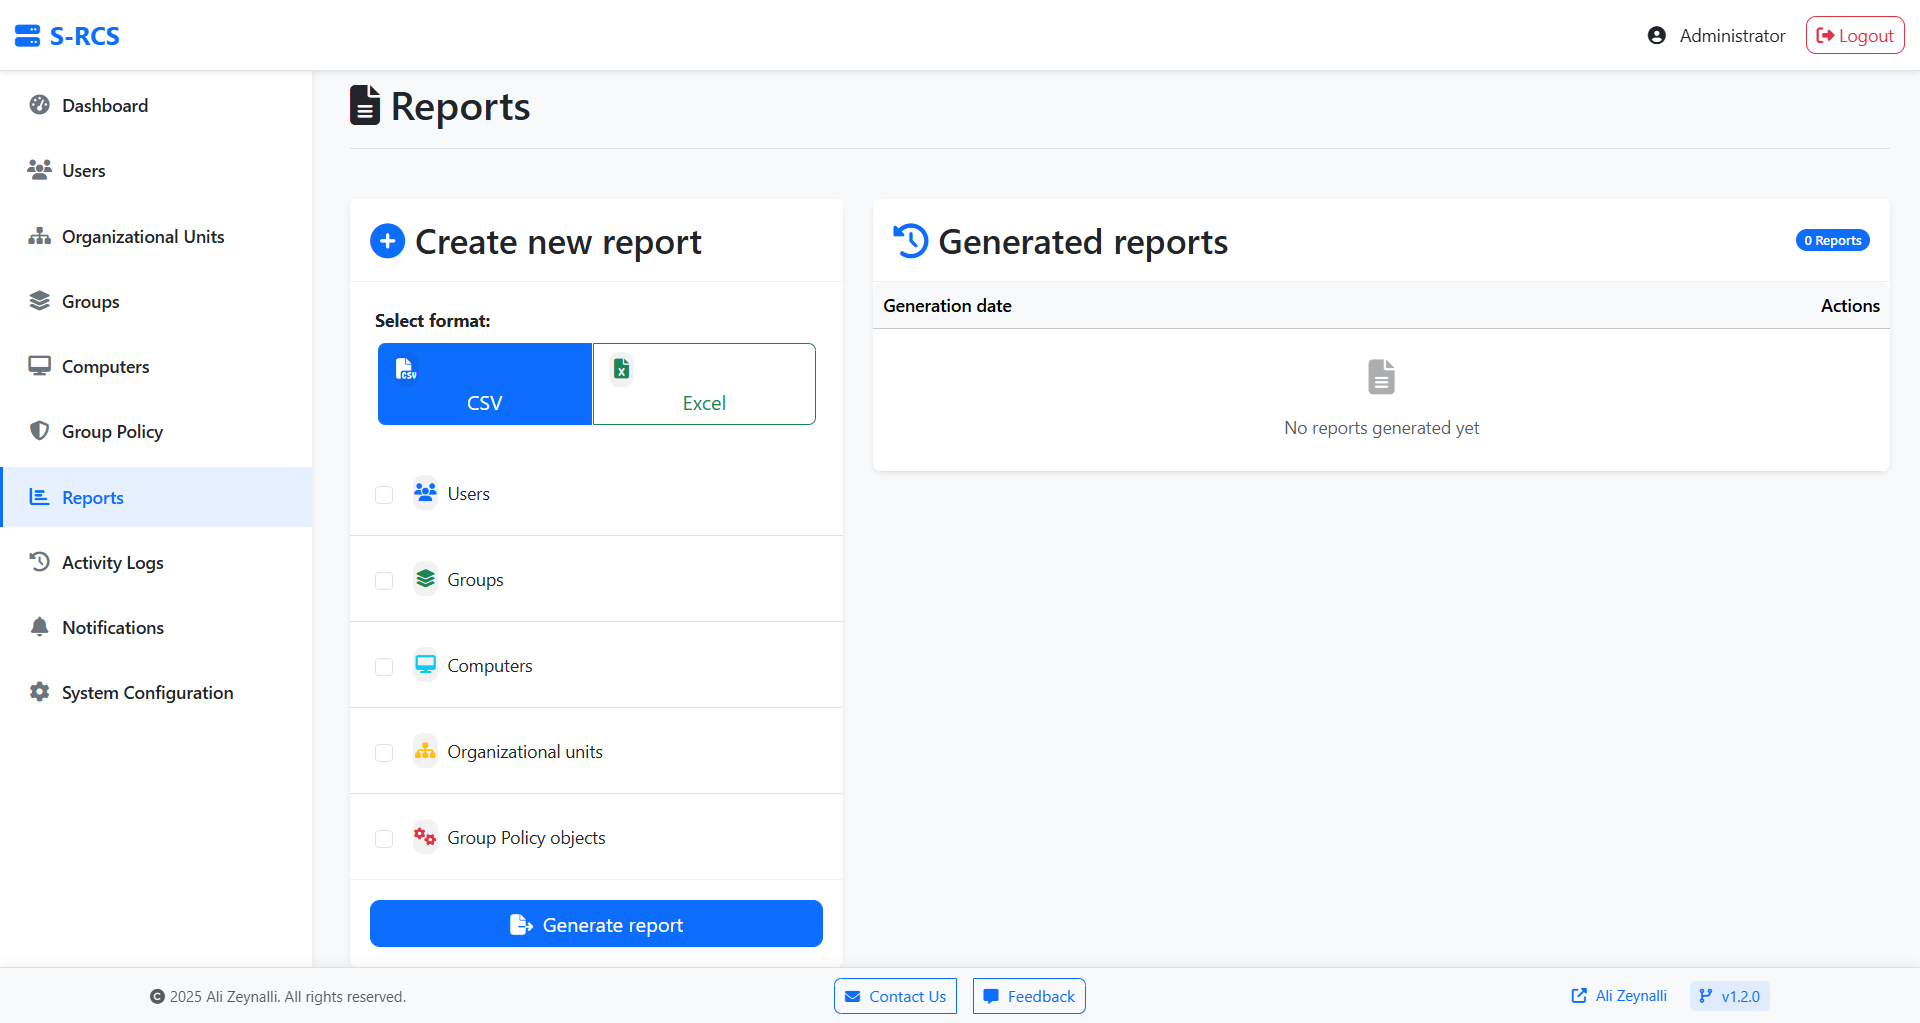
Dashboard & Login
The interactive dashboard allows you to monitor your AD environment at a glance.
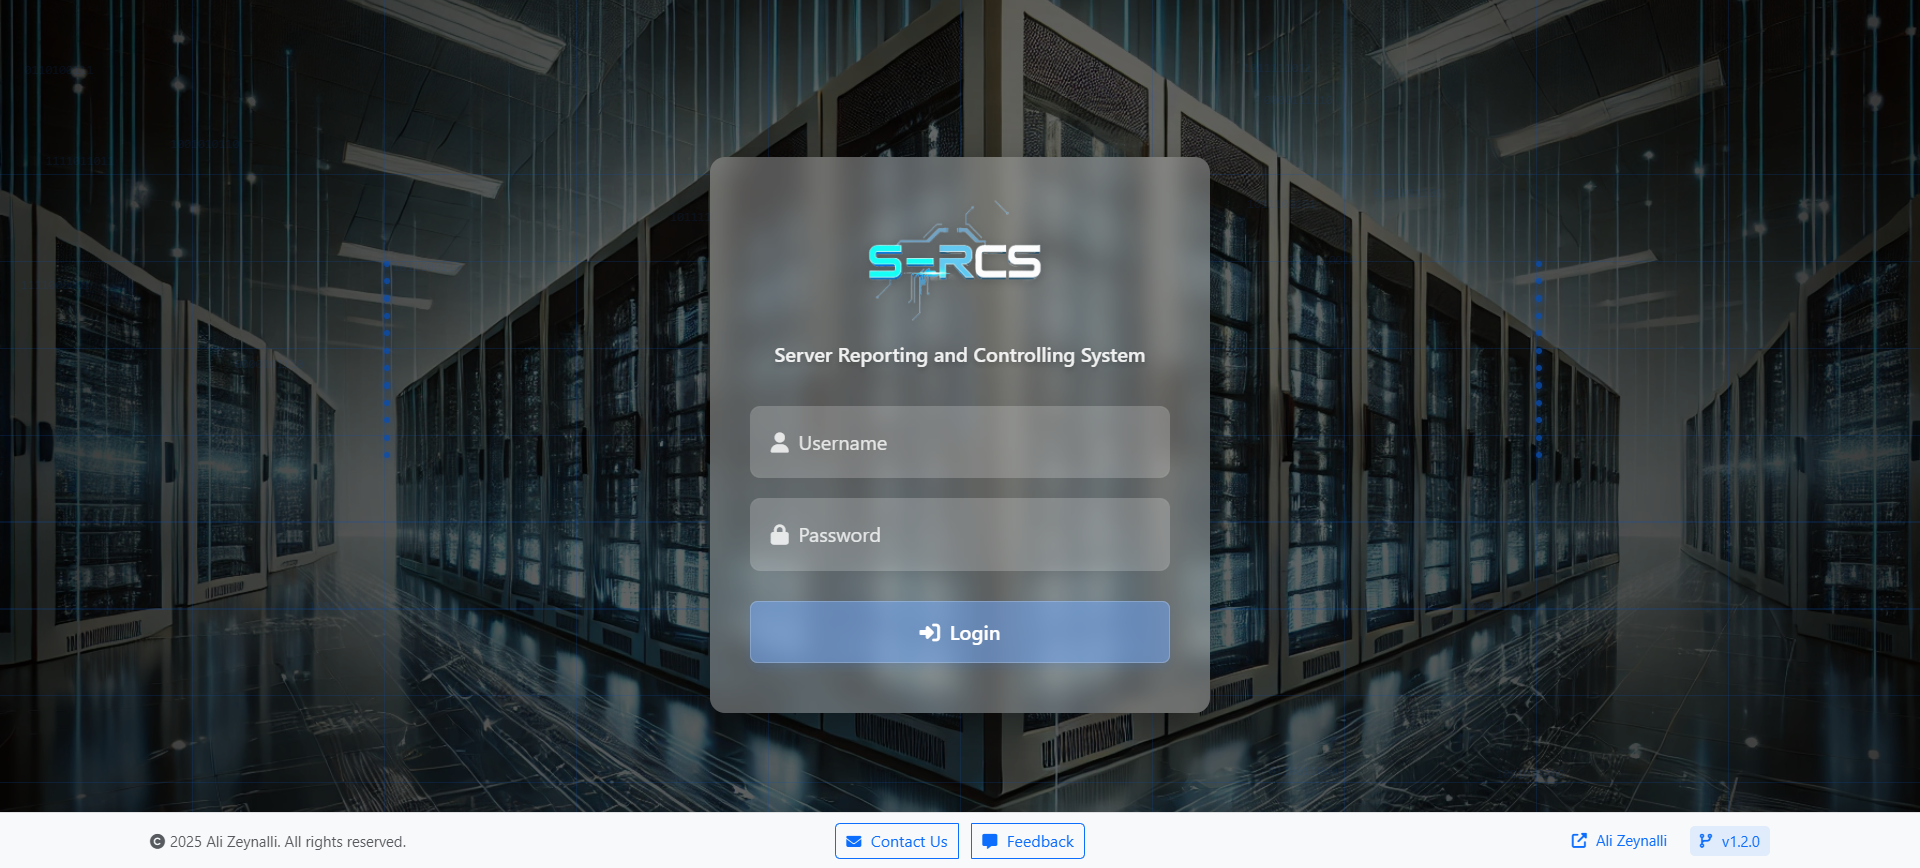
Login Screen
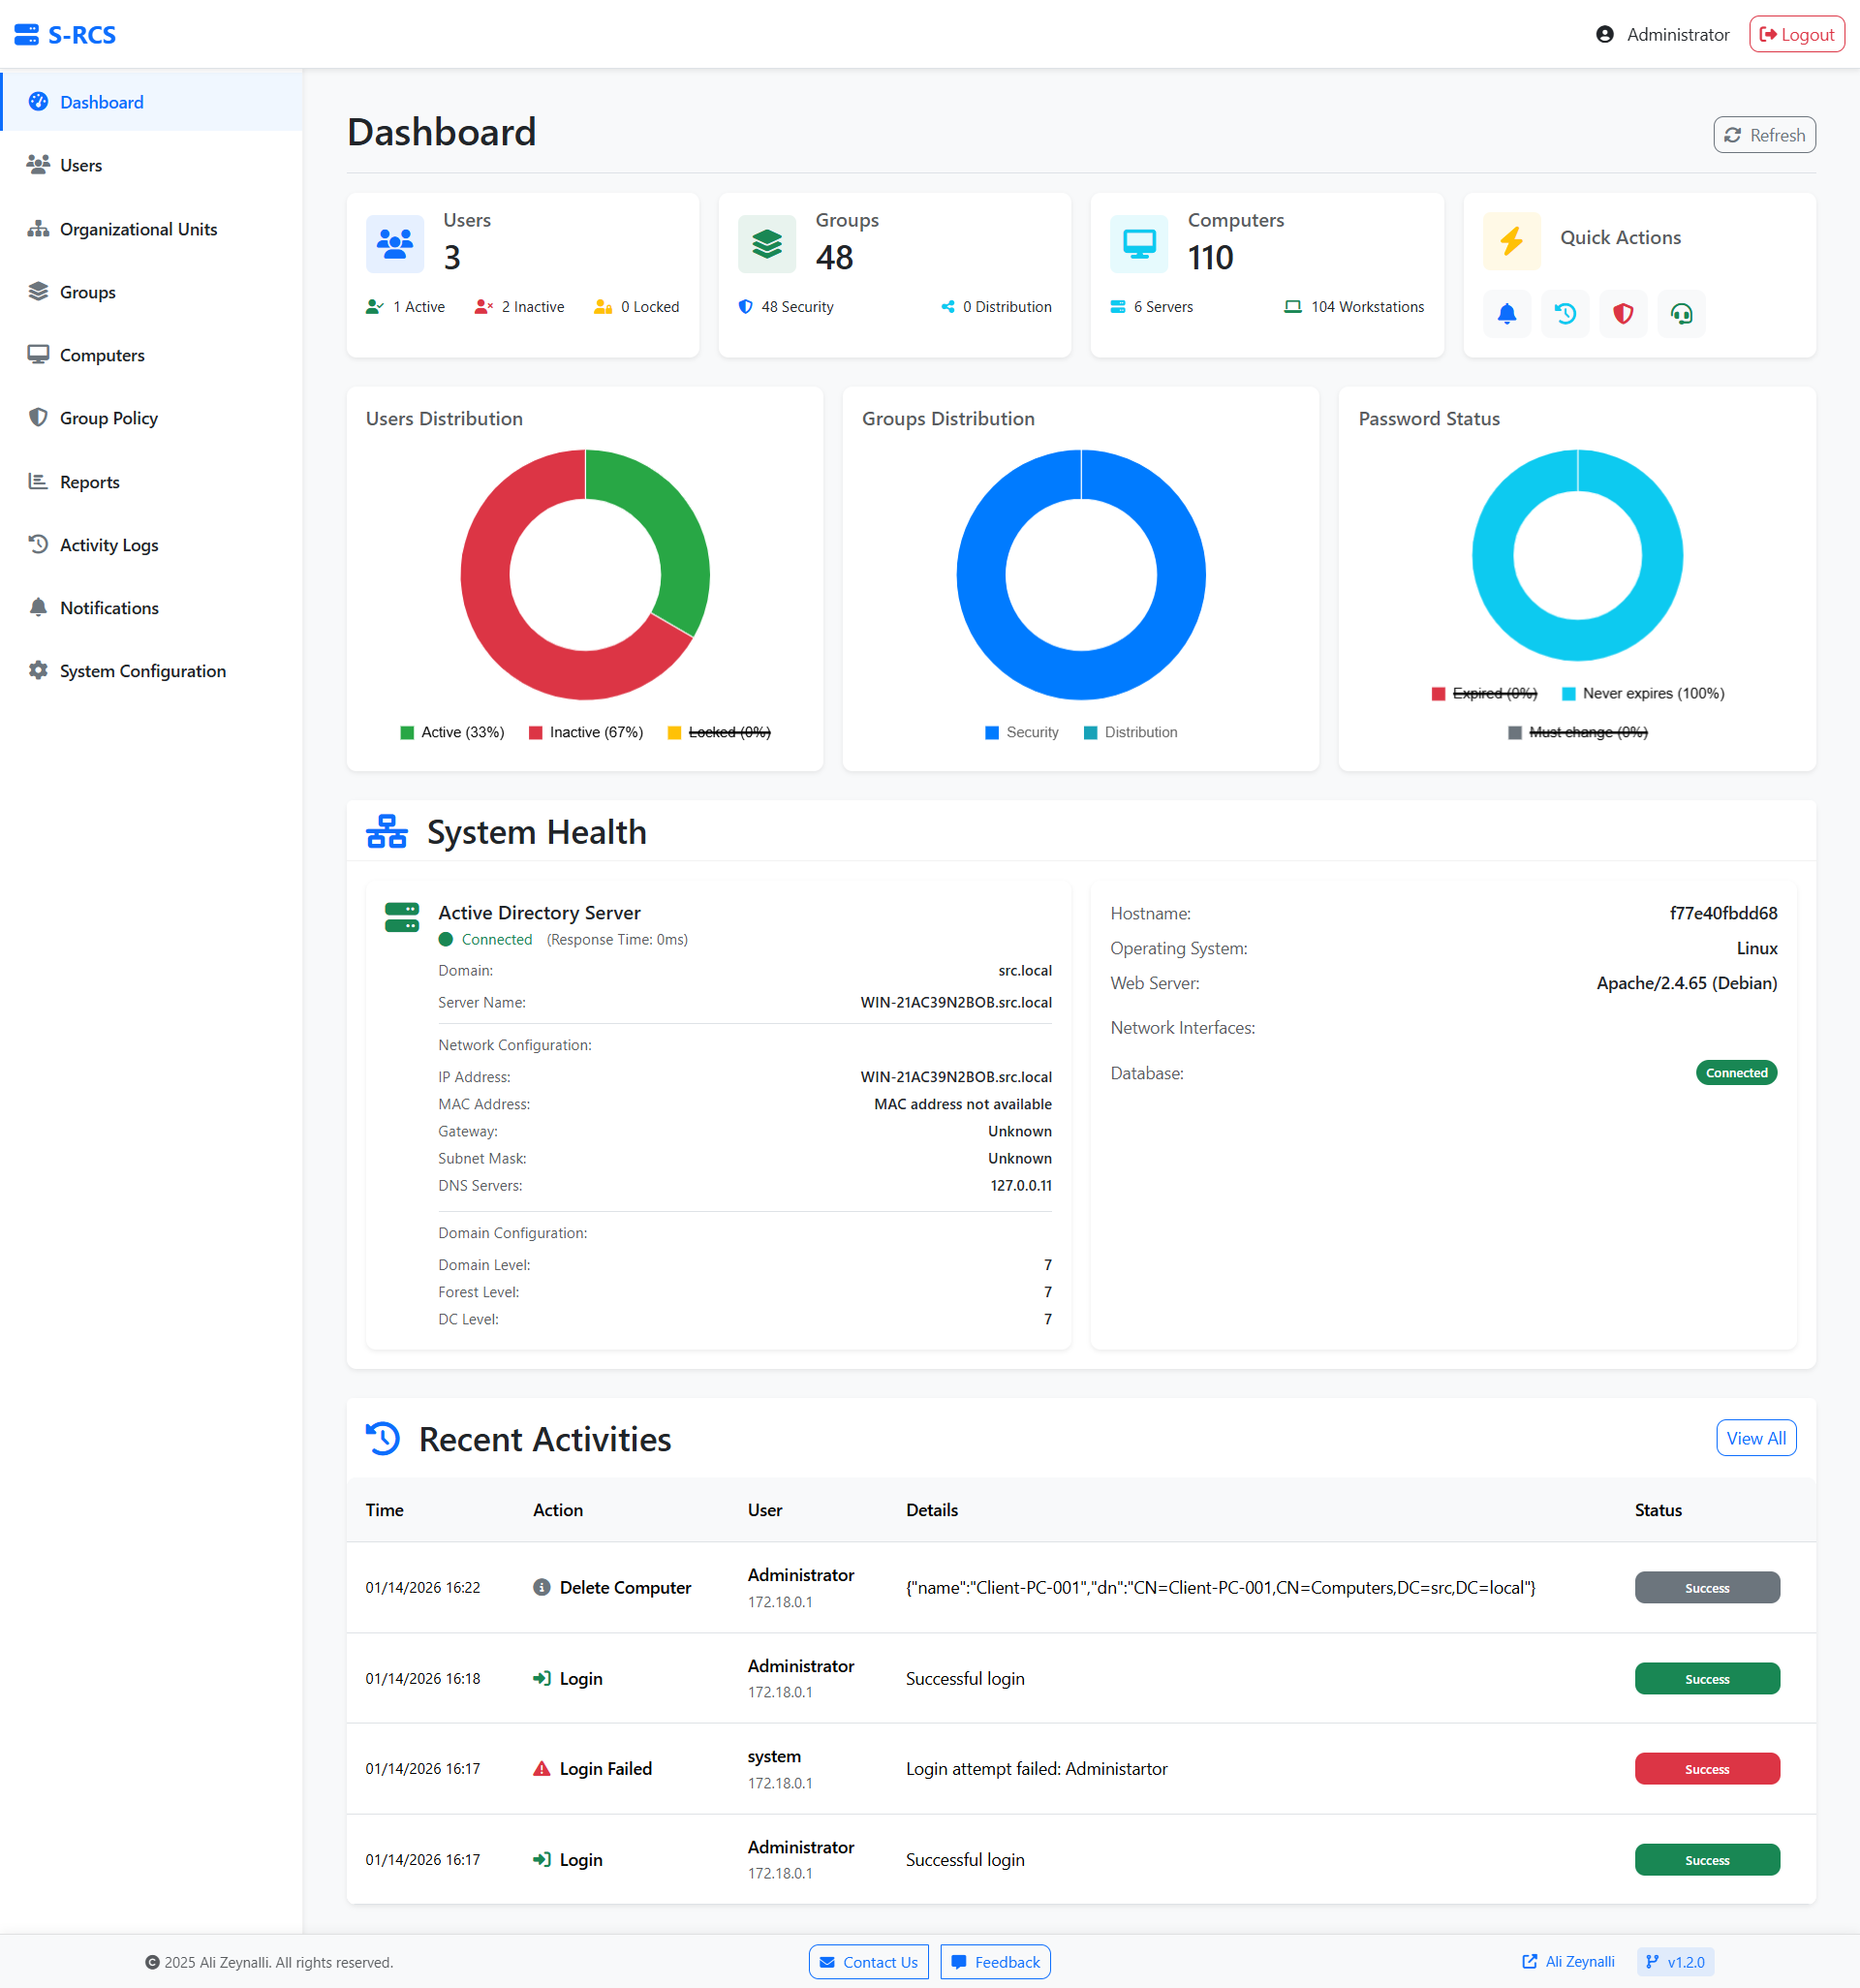
Dashboard
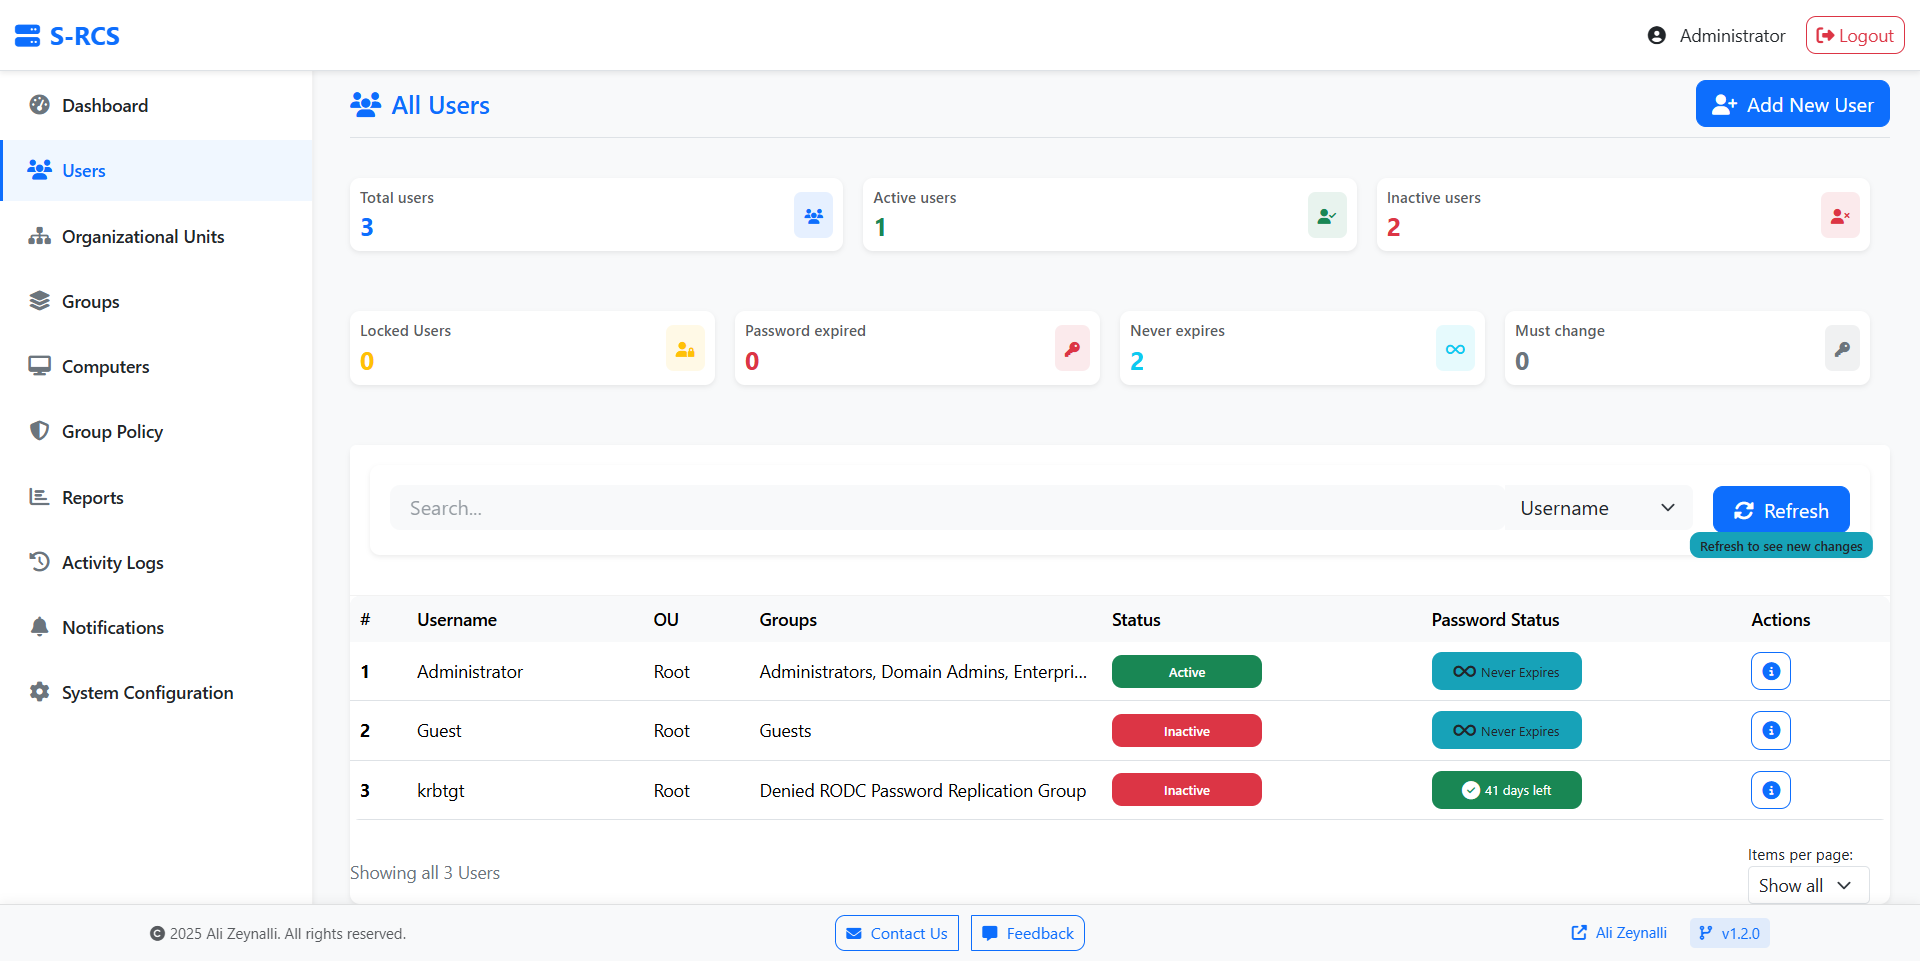
User Management
Manage users with ease: Reset passwords, unlock accounts, disable/enable, and delete users.
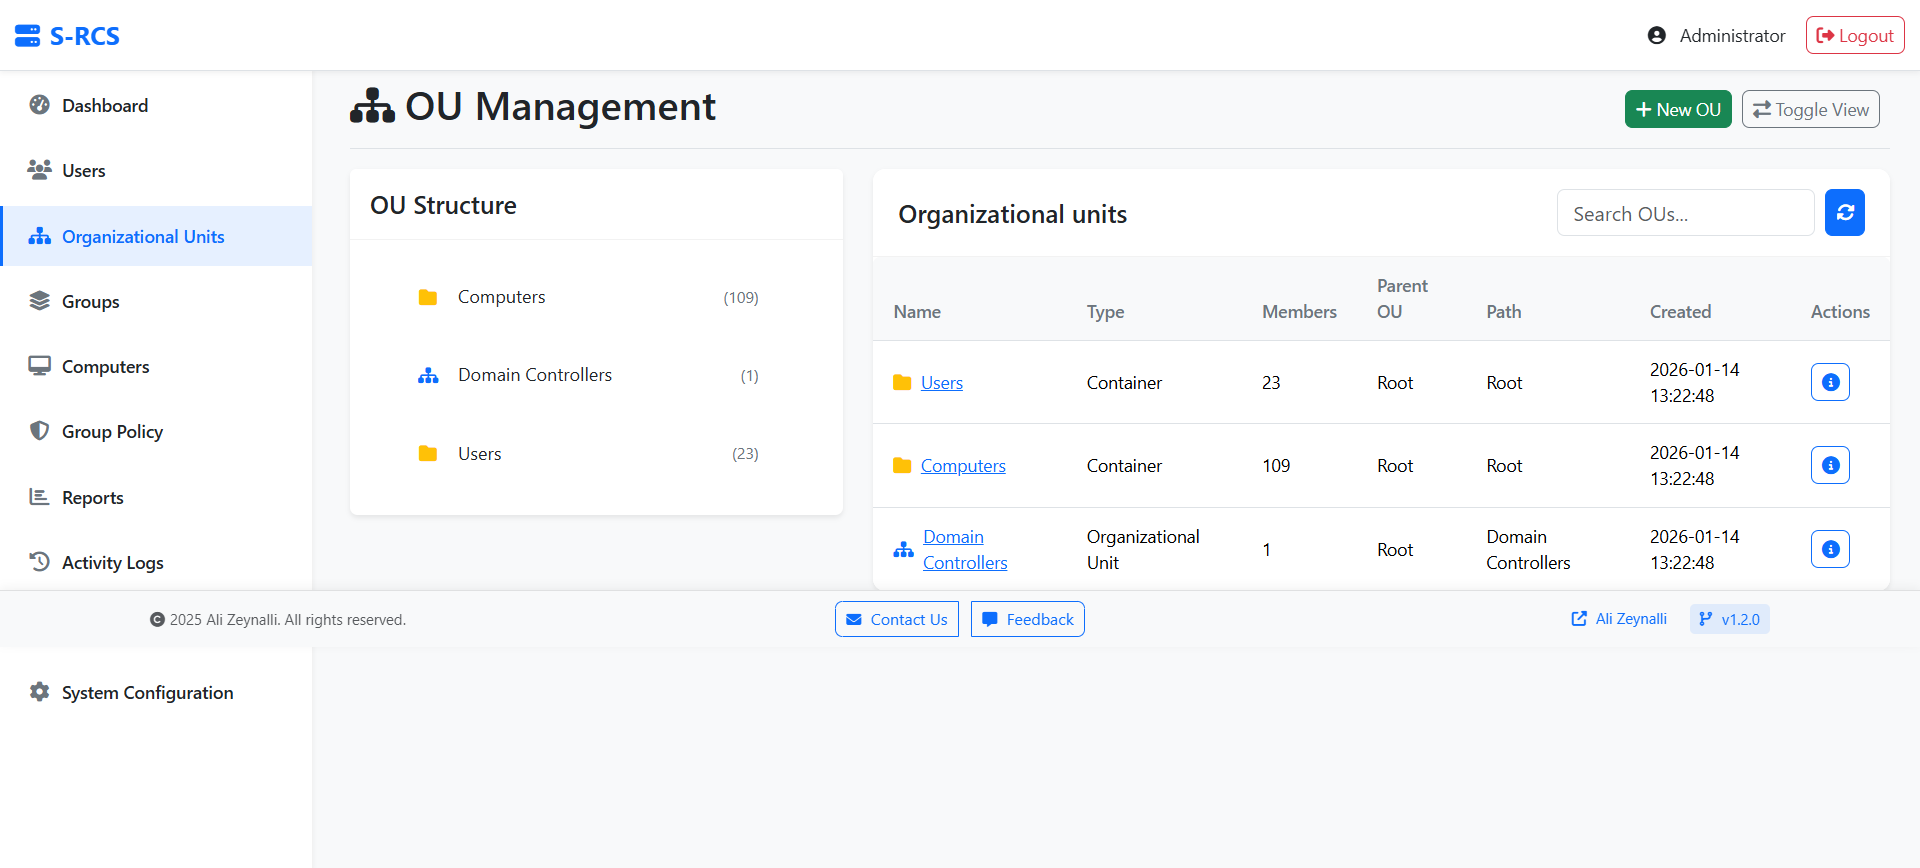
OU Management
Explore your Organization Units in Tree View or Table View.
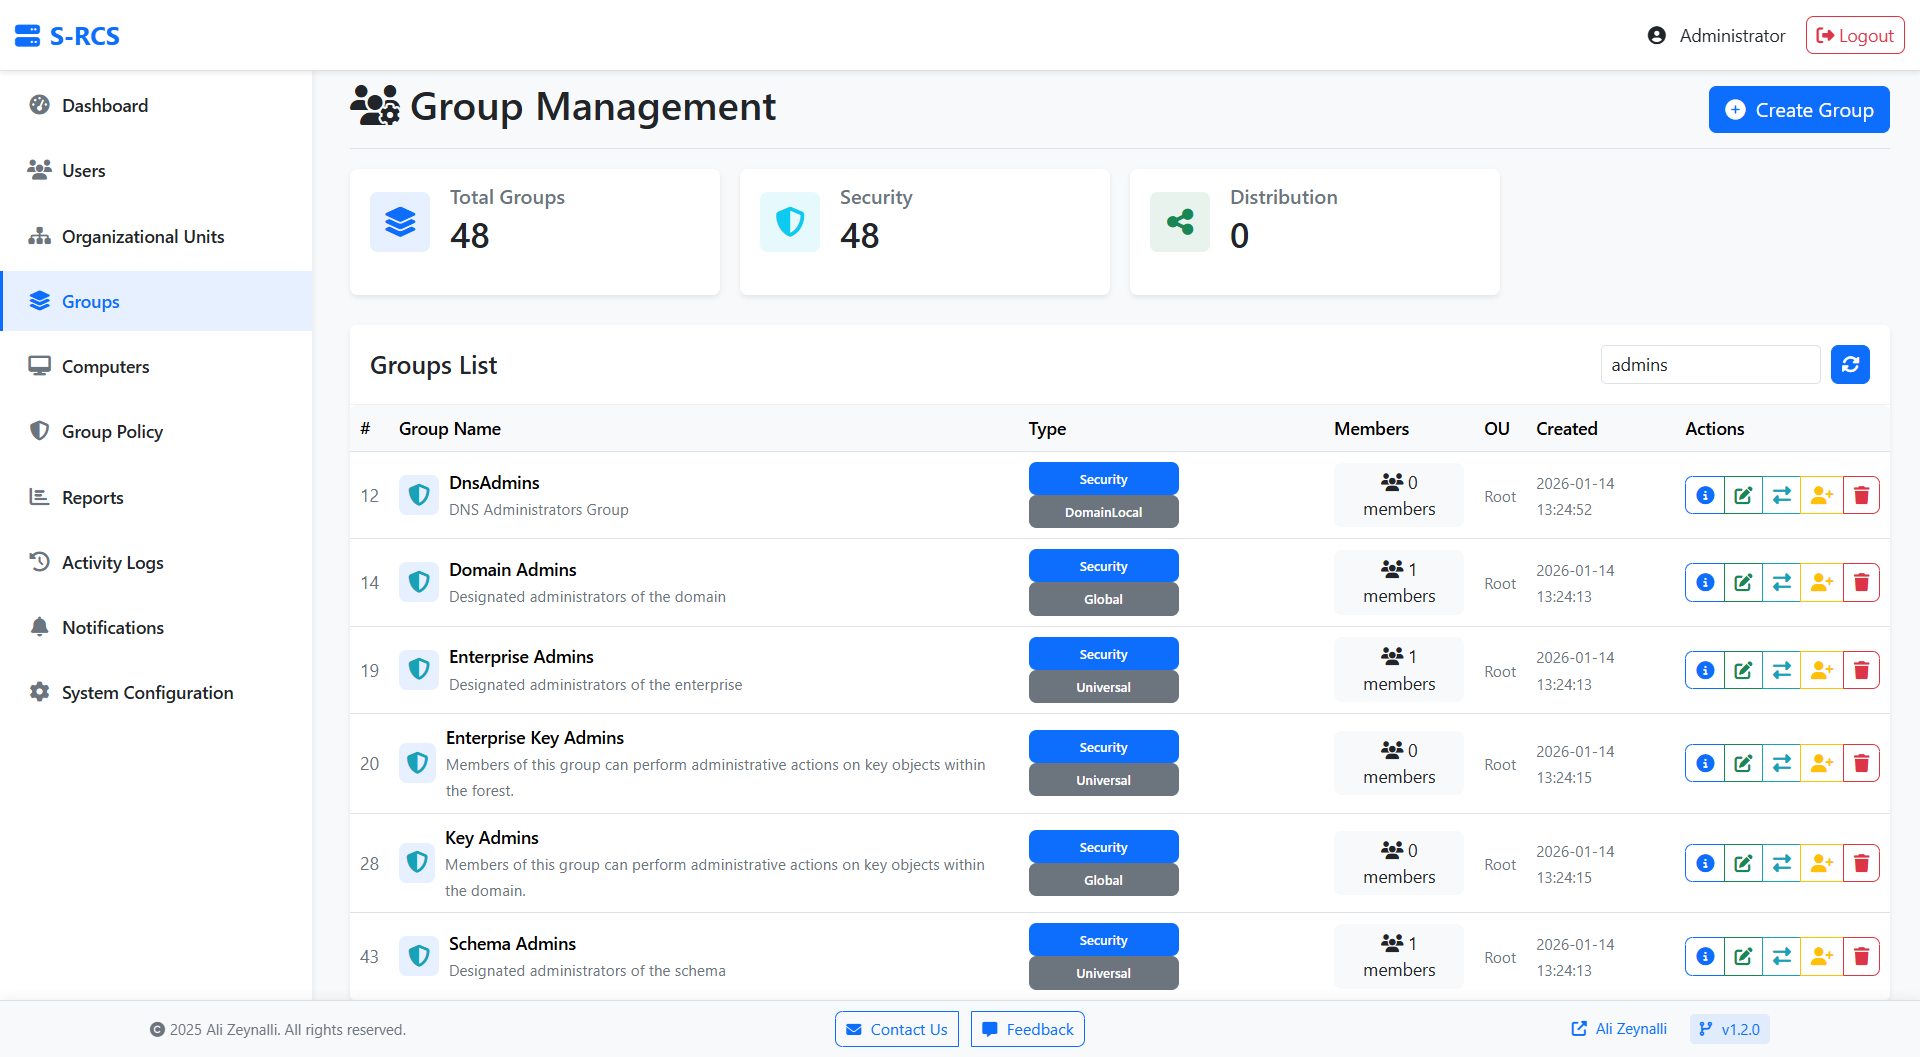
Group Management
Create and manage Security and Distribution groups. Bulk add members feature available.
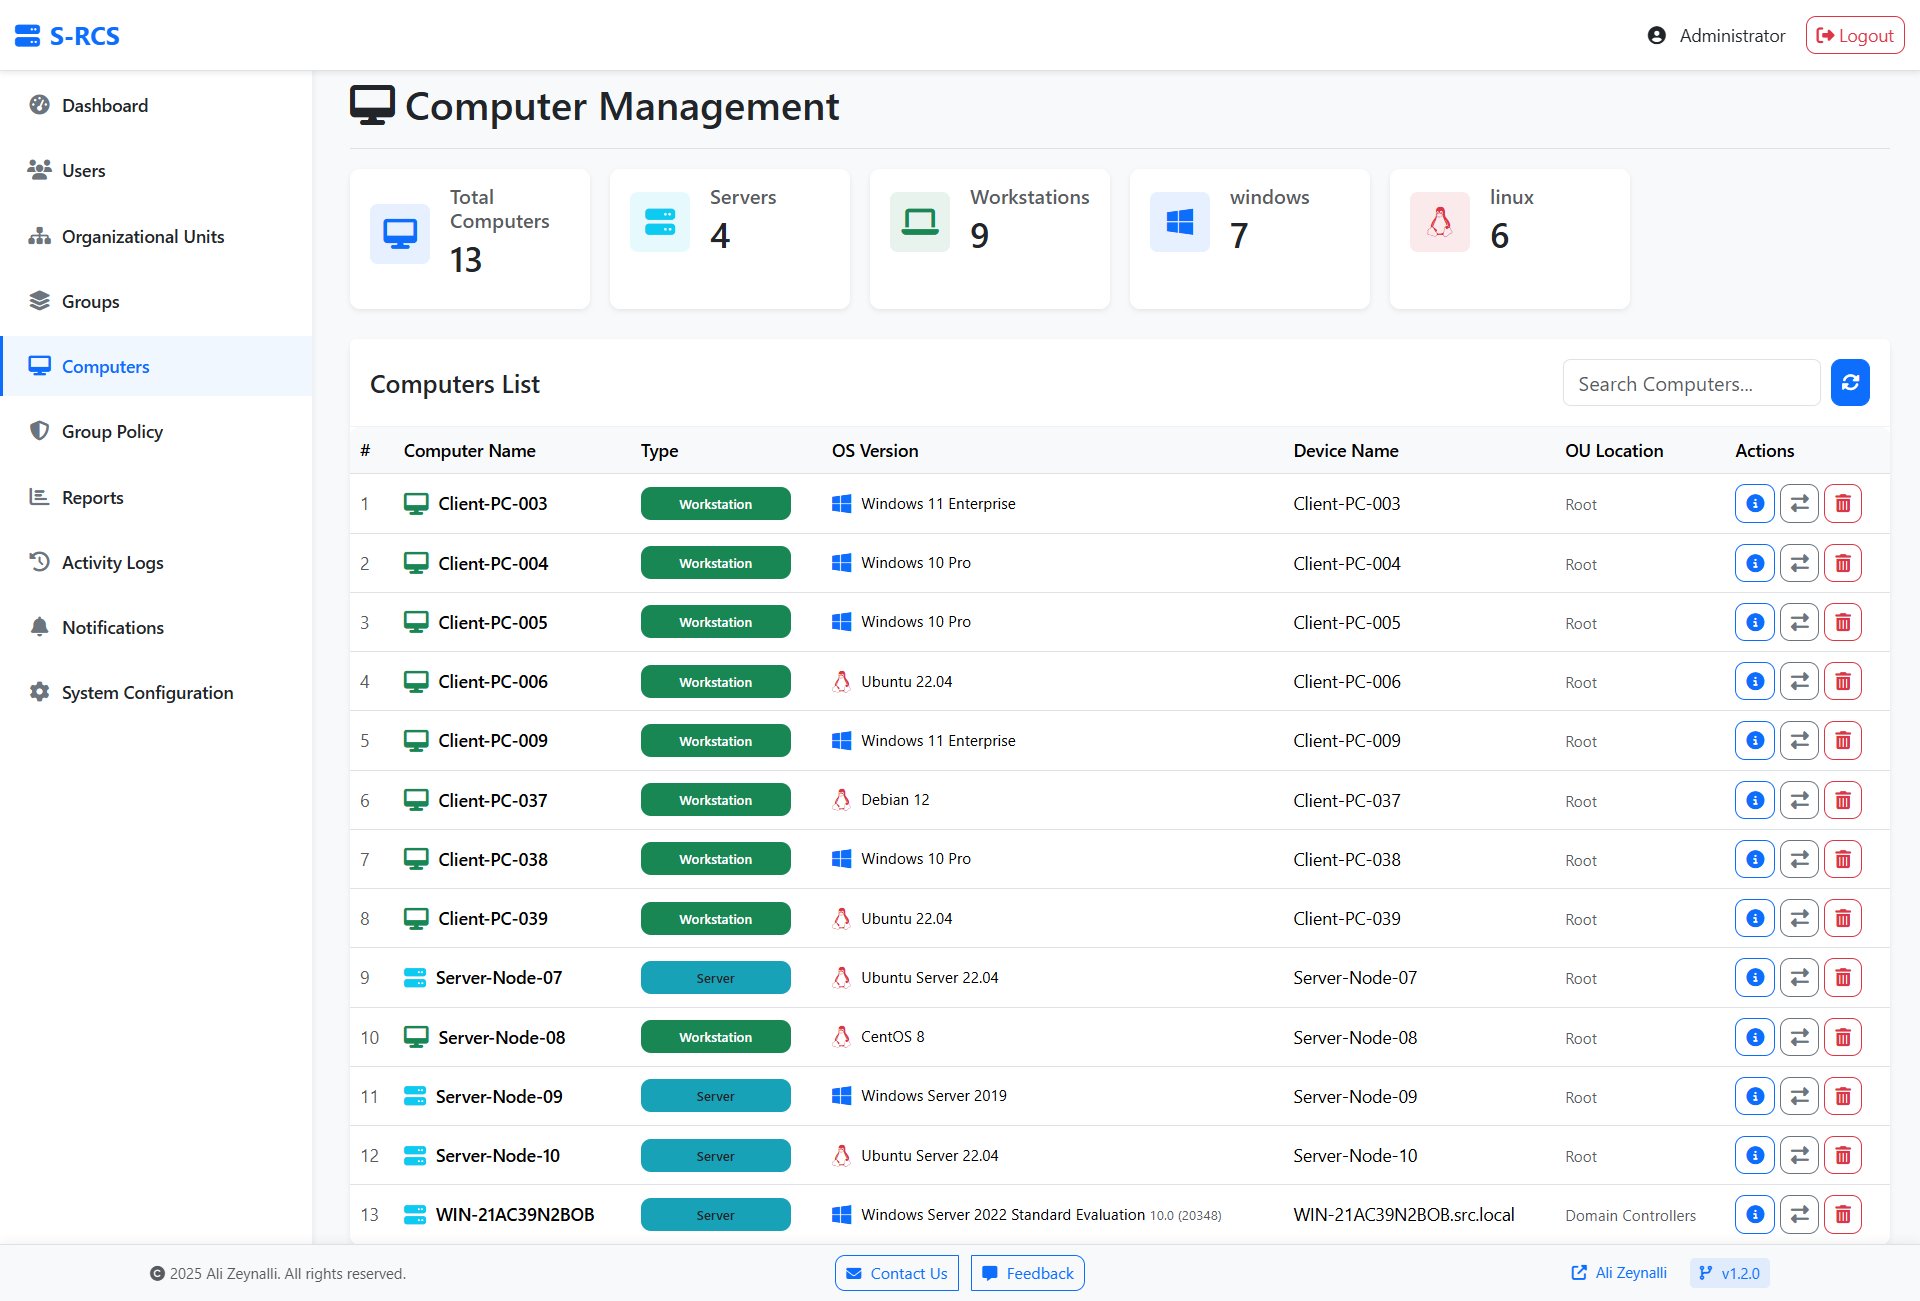
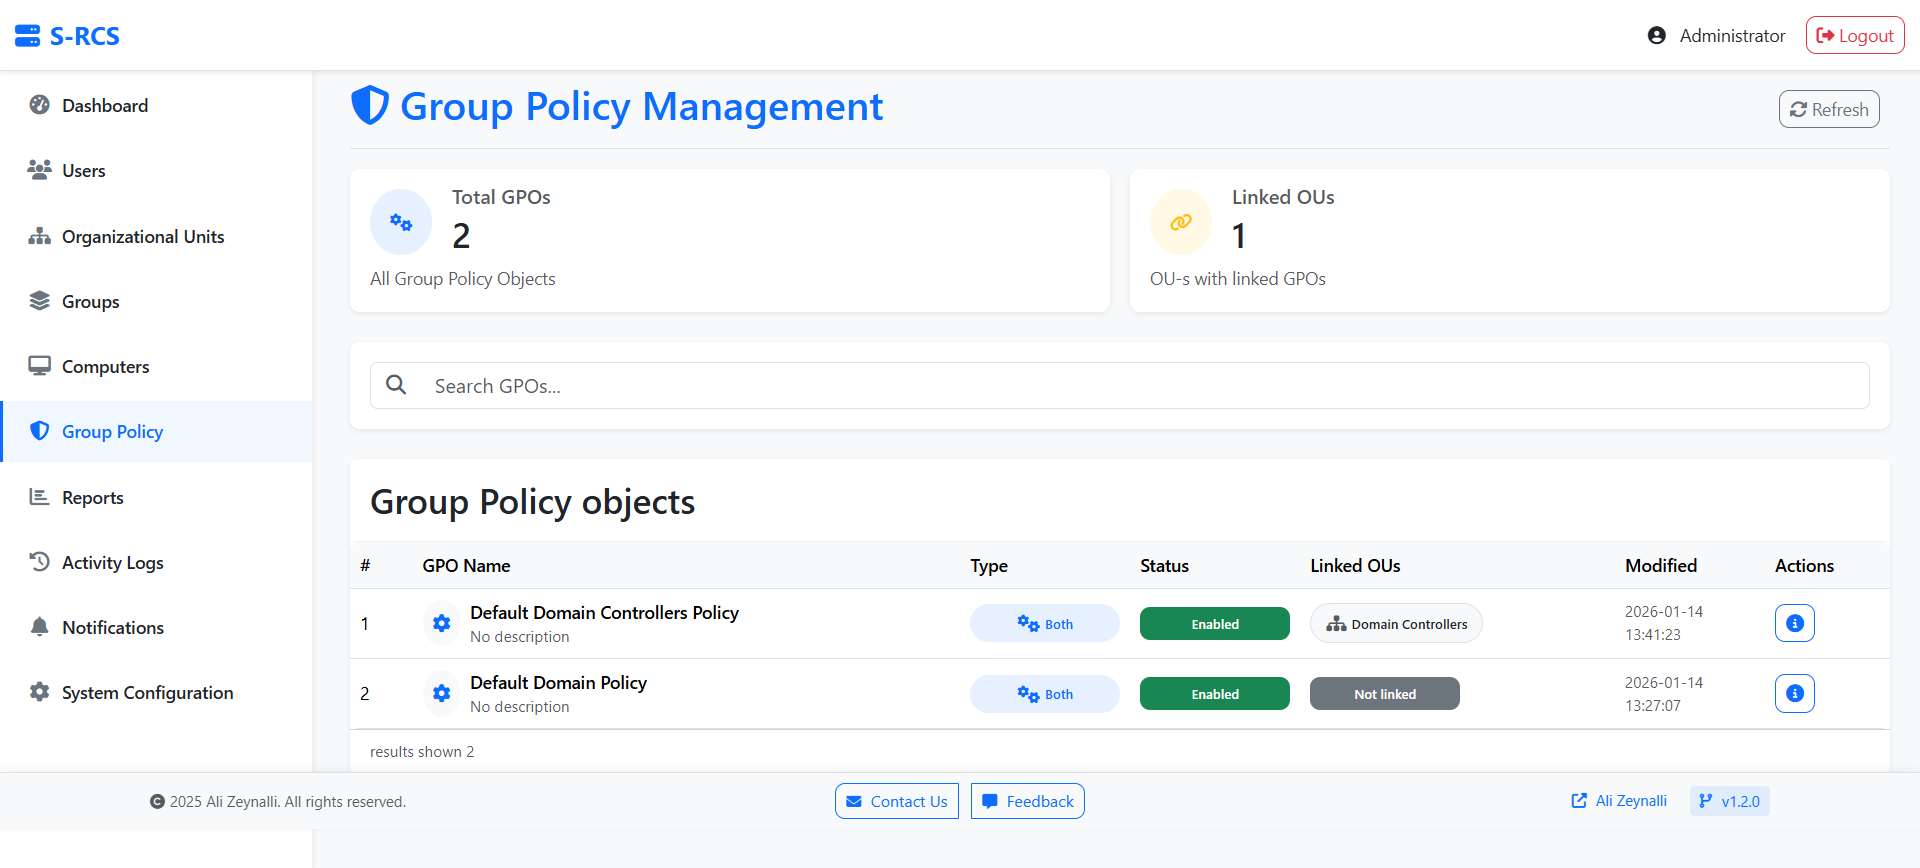
Computers & GPOs
View computer objects and GPO details.
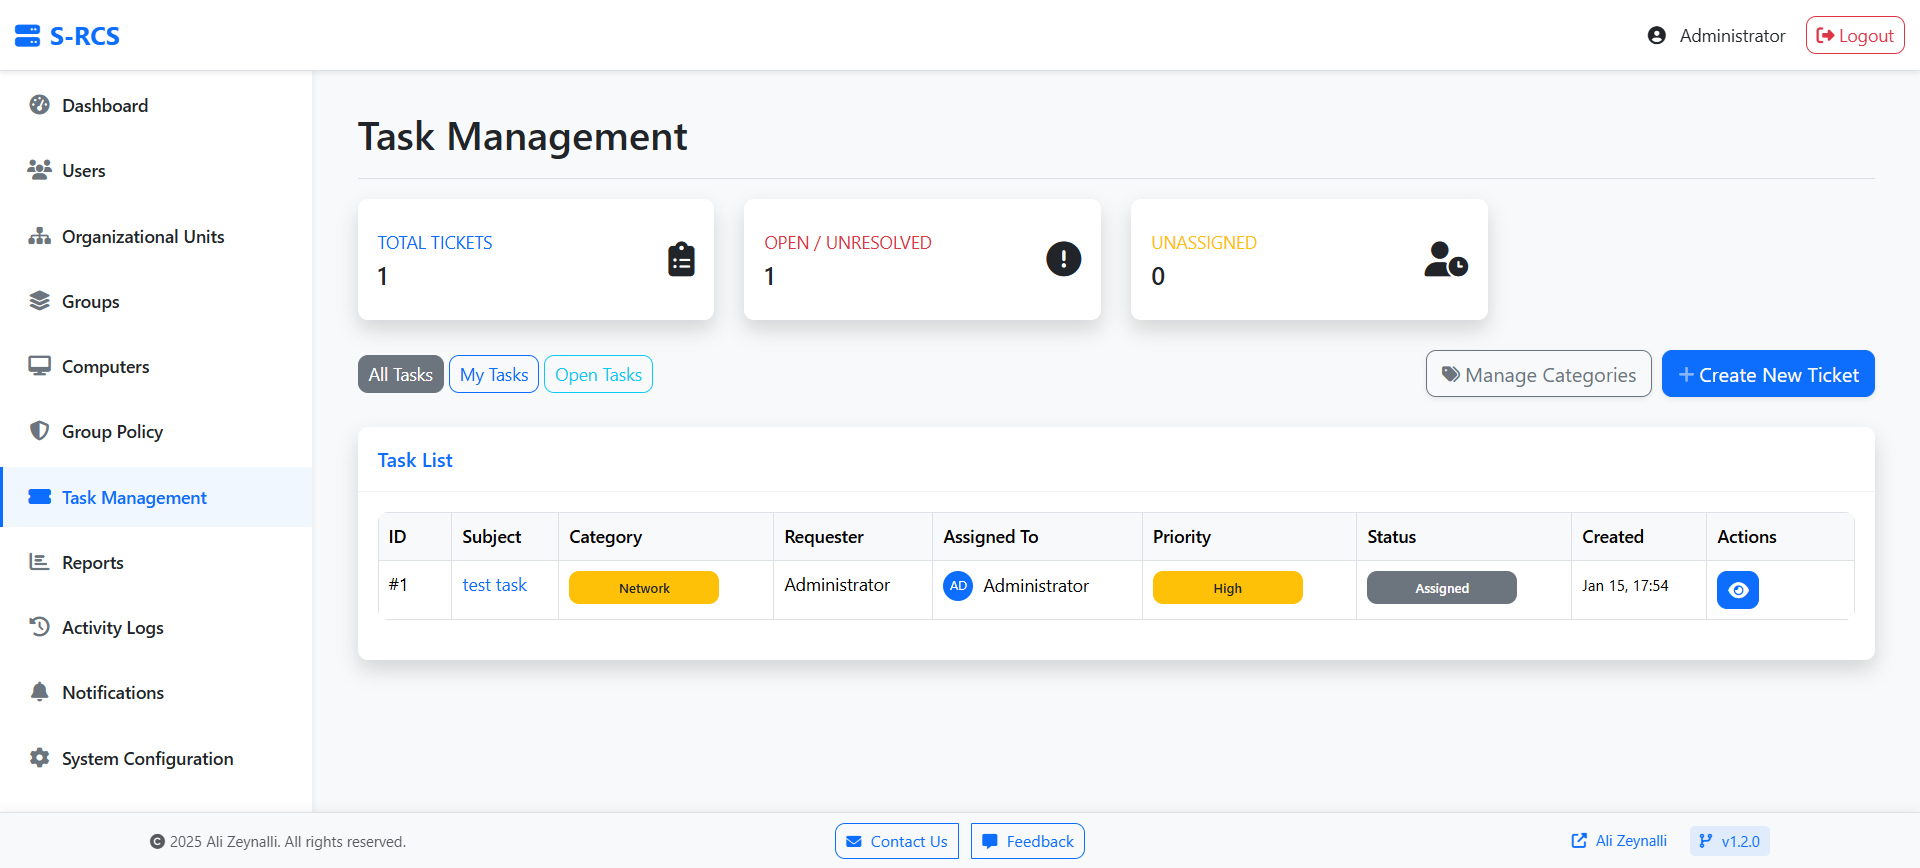
Task Management
Internal Helpdesk system for tracking IT requests.
Reporting
Export data to CSV/Excel for auditing.
Audit Logs
Track all administrator actions within the portal.

Troubleshooting
LDAP Error: "Can't contact LDAP server"
- Ensure Port 636 is open on the DC (Firewall).
- Verify Certificate Services are installed (Root CA).
- Check if you are using the correct IP/Hostname.
- Test:
Test-NetConnection DC_IP -Port 636
MySQL Error: "Data directory unusable"
If the database fails to initialize, clear the volume and restart:
docker-compose down
# Remove mysql volume/folder
docker-compose up -d --build
Container Logs
docker-compose logs              # All logs
docker-compose logs php-apache   # Apache only
docker-compose logs mysql        # MySQL only
Port Conflicts
- Change
HTTP_PORTorHTTPS_PORTin the.envfile. - Restart containers:
docker-compose up -d
Remote Access
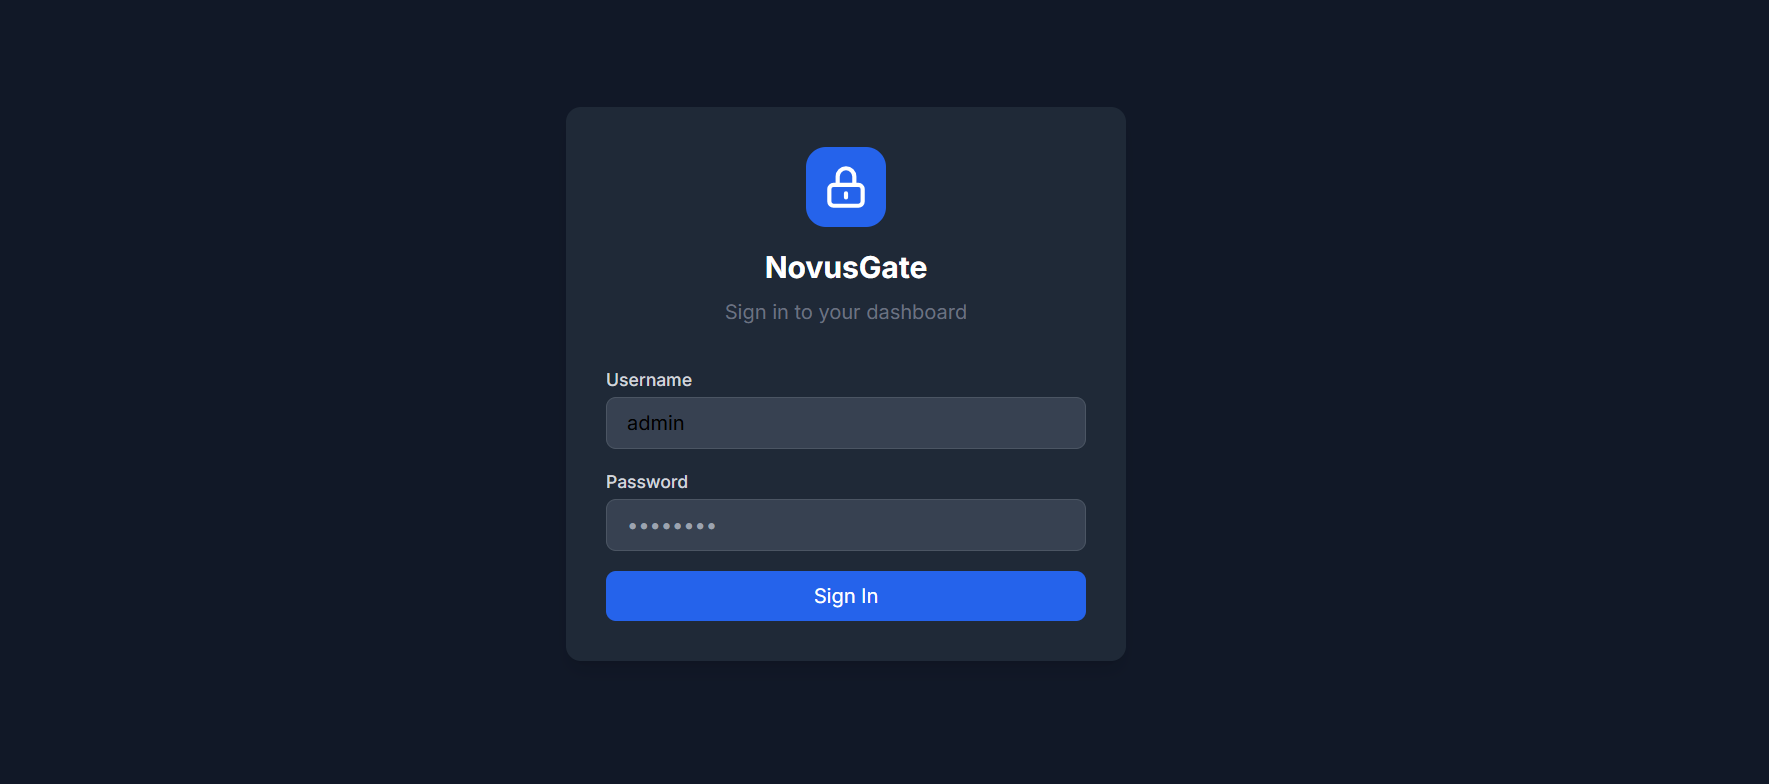
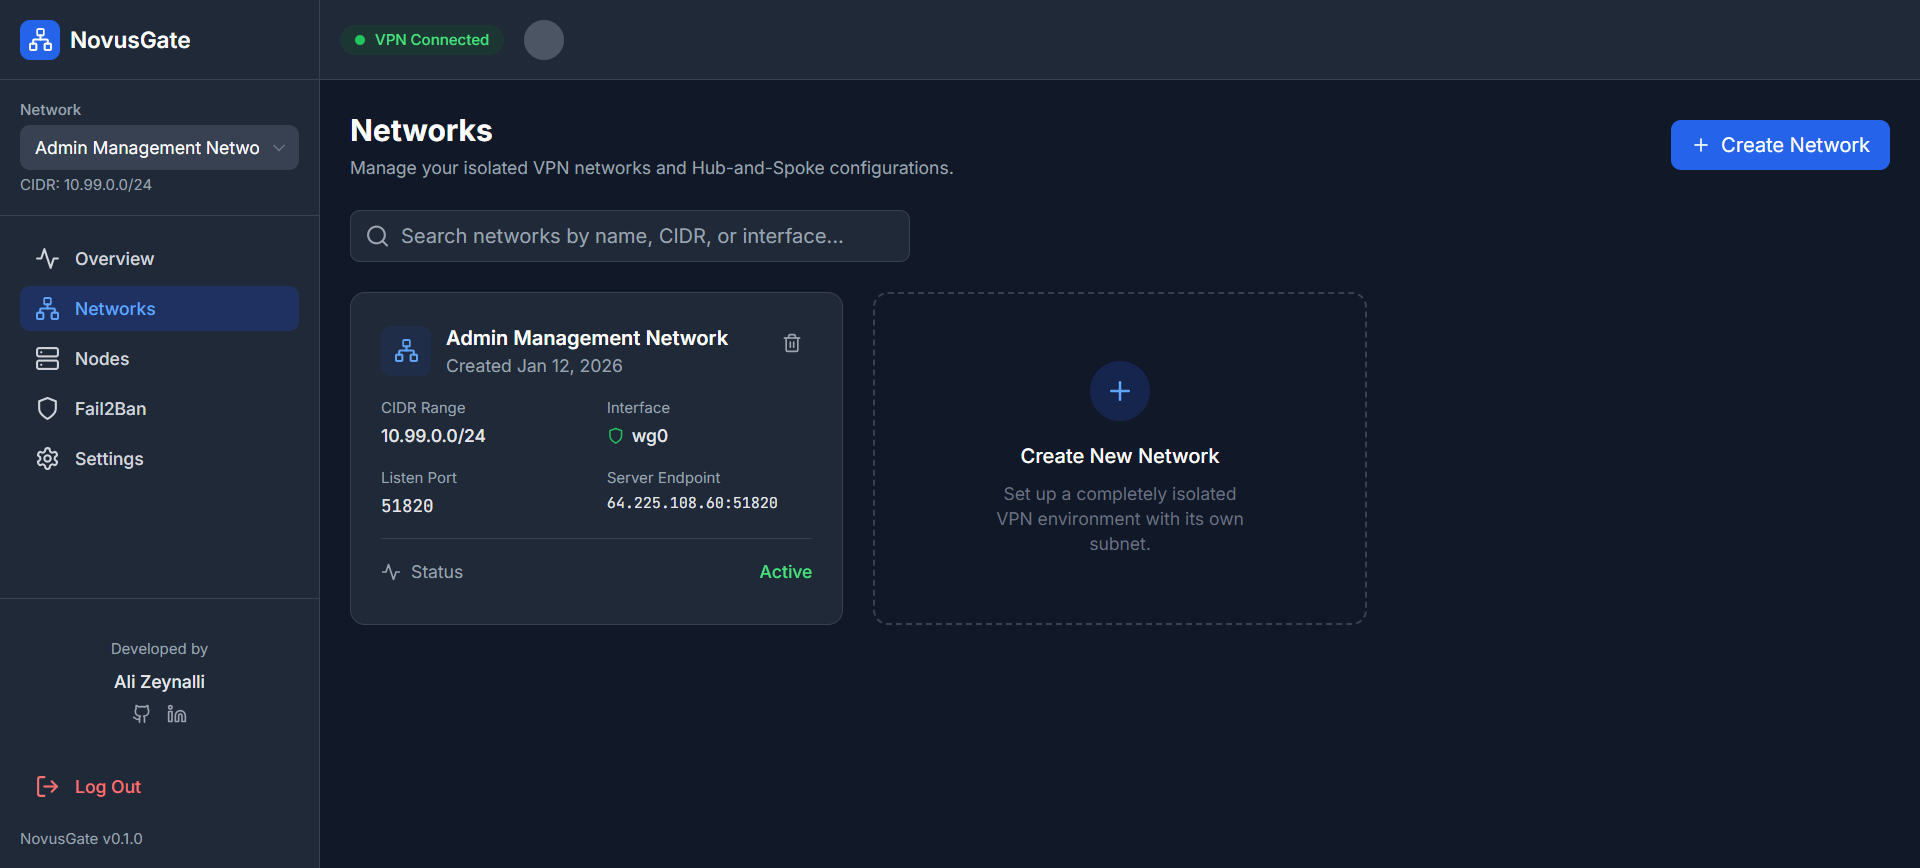
Use NovusGate VPN to access S-RCS securely from anywhere without static IPs.
Enterprise Support
We offer paid support services for installation, training, and customization.
Contact Us
- Ali.Z.Zeynalli@gmail.com
- +49 152 2209 4631
- LinkedIn Profile